Getting Started!
Before you can open the Construct 2 plugin you need to install all needed plugins. You can find all needed plugins in the “01_Plugin” folder. Please check always for updates!
CocoonIO
Please download the Cocoon Construct 2 plugins below. They are free.
Cocoon Construct 2 Plugins 0.00 KB 11392 downloads
Download the Cocoon Plugins for Construct 2 now! The download link fetches the latest...Cordova
This template needs the premium cordova plugin package by cranberrygame. If you do not own it, please get it here.
Cranberrygame - Cordova Plugins 150 MB 5171 downloads
Download the awesome Cordova Plugin Package provided by Cranberrygame. The package...Testing
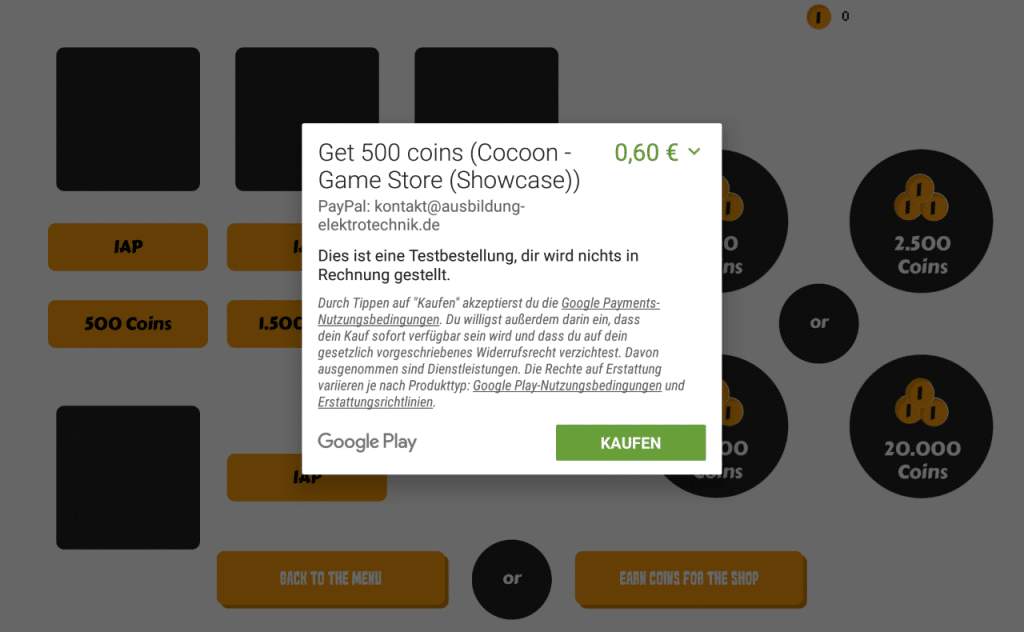
You can test our template (also the IAP Purchases). In order to don’t get charged for the test purchase, please follow the steps below.
- Becom a Beta Tester of our “Cocoon – Game Store” app (Click on Become Tester and then download the App from the Google Play Store)
- Contact us and provide us your Google Account (the one you used to download the app as beta tester). We will add you then as license tester. Once we have notified you, please wait 15 minutes. Then you should be able to purchase the InApp Products as Tester. Find out more here.
- Provide your feedback! All feedback is appreciated, so please let us know over here!
Functions
Now we can start explaining how it works in detail.
InApp Purchases
In order to setup the InApp purchases you must visit your Google Play Developer Console.
[creativ_button url=”https://play.google.com/apps/publish/” icon=”user” label=”Google Developer Console” colour=”theme” colour_custom=”” size=”medium” edge=”straight” target=”_blank”]
Then select your app and upload an apk file with the InApp Permission included. This permission is included automatically when you have included the “CocoonInApp” plugin. Upload it as Alpha/Beta!! You can find out more about “Testing the IAP” here.
[creativ_button url=”https://shatter-box.com/knowledgebase/android-test-inapp-purchases-with-construct-2/” icon=”book” label=”Construct 2 – How to test InApp Products” colour=”theme” colour_custom=”” size=”medium” edge=”straight” target=”_blank”]
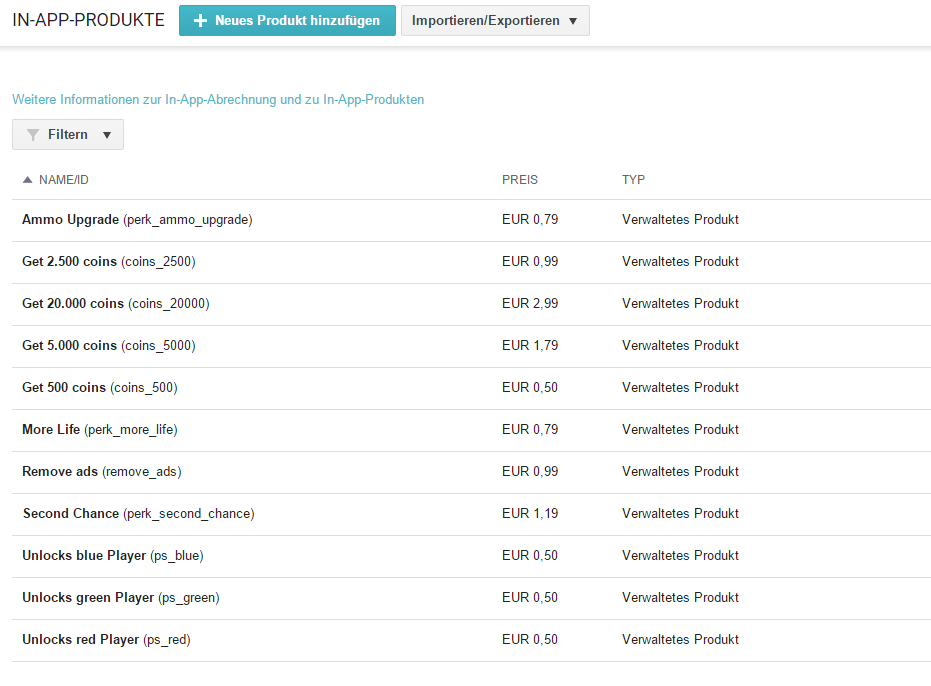
Then switch to the “InApp Products” tab and add all needed ID’s like shown below.
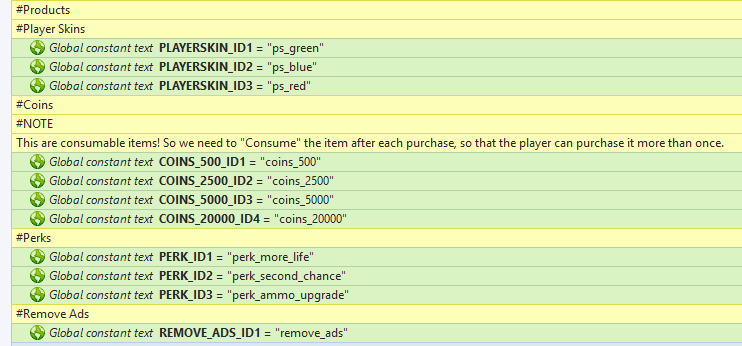
You can find the same ID’s in the “es_inapp” Event Sheet.
Product Types
- Player Skins (not consumable, player can purchase it only once)
- Perks (consumable, player can purchase it as often he/she likes)
- Coin Packs (consumable, player can purchase it as often he/she likes)
- Remove Ads (not consumable, player can purchase it only once)
Important for Coins and Perks
Due to the fact that coins and perks should be able to be purchased more than once, we need to “Consume” the purchase after it had finished. You find this function in the “es_inapp” Event Sheet at “On Purchase Succceded” (Group).
If you need a more detail guide, please see here.
[creativ_button url=”https://shatter-box.com/knowledgebase/cocoonio-how-to-build-a-game-using-construct-2/#document-10″ icon=”book” label=”Cocoon – Install and use CocoonInApps” colour=”theme” colour_custom=”” size=”medium” edge=”straight” target=”_blank”]
Basics
The game is optimized for CocoonIO and is using following Plugins.
- Cocoon Canvas+
- Cocoon InApp
- Cordova Dialog
- Cordova Chartboost
The Cocoon Canvas+ Plugin is used to detect if the game is on Canvas+. This avoids JavaScript errors during the browser preview.
Log
The game has a log function included. Whenever the variable “LOG” is equal to “1” the game will log results in the browser. This can be very useful for debugging, but you can only enter the log when you run your game in the Developer App. Please see here to find out how the Developer App works.
[creativ_button url=”https://shatter-box.com/knowledgebase/cocoonio-how-to-build-a-game-using-construct-2/#document-7″ icon=”eye-open” label=”How to debug a game” colour=”theme” colour_custom=”” size=”medium” edge=”straight” target=”_blank”]
When your game goes live, set “LOG” to “0”. This option should be turned on only for testing.
Dialogs
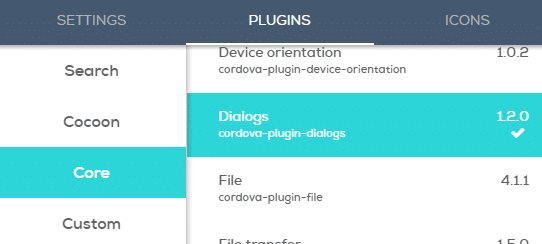
The game is using the “Cordova Dialog” plugin in order to notify the Player with “Alerts” or asking him/her to “Confirm” something. In order to use this in your Android game you must install the Core Plugin “Dialogs” in your CocoonIO Projekt.
Player Selection
The Player Selection screen is using the “PlayerSkin” array in order to find out which Skin is available or not. The “PlayerSkin” array will be saved in the LocalStorage on each change. If the player tries to use an “locked” Skin he/she will be notifed by the game that this skin is locked. If he/she clicks on the “Locked” badge (round one) the player will be redirected to the store and can perform a purchase.
The player in the game will automatically have the chosen skin. All actions and events can be found in the “es_equipPlayer” event sheet.
Chartboost
The player has the opportunity to earn extra coins by watching “Rewarded Videos” or “Interstital Ads”. This service is provided by Chartboost. You find a complete guide over here.
[creativ_button url=”https://shatter-box.com/knowledgebase/cocoonio-how-to-build-a-game-using-construct-2/#document-15″ icon=”bar-chart” label=”Cordova – Chartboost” colour=”theme” colour_custom=”” size=”medium” edge=”straight” target=”_blank”]
Earnings
- Rewarded Video: 200 Coins
- Interstital Ad: 80 Coins
The Videos are not limited in time.
This values can be adjusted in the “es_earnCoins” Event Sheet.


