Get Started
Download Tool
First of all you need to download our Windows 10 – Signing Tool. To do so, please visit the link below.
[creativ_button url=”https://shatter-box.com/forums/applications/core/interface/file/attachment.php?id=48″ icon=”download-alt” label=”Windows 10 – Signing Tool” colour=”green” colour_custom=”” size=”medium” edge=”straight” target=”_blank”]
Install WDK
In order to use our tool you need to download and install the Windows 10 Developer Kit.
Once you’ve downloaded and installed the WDK, start the Windows 10 – Signing Tool and enter the installation path.
Set path to WDK
If you haven’t chosen the default installation path, you either can copy the path in the text box or you can find the path while using the “Choose Path” button. Additionally you can download it by clicking the “Download” button.
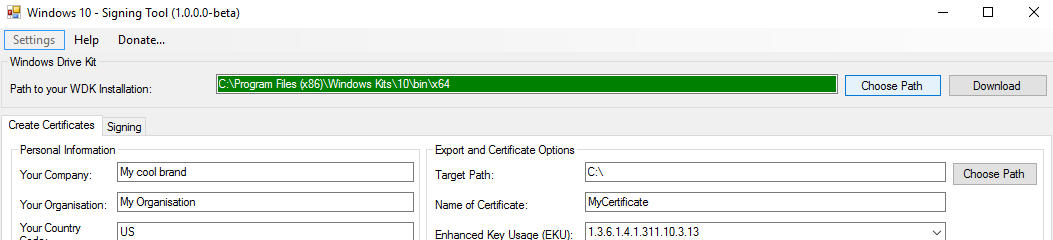
If the path is valid, the text box turns green.
Signing Tool
To be able to upload a windows program / game, it must be signed with a valid certificate. So we’ll start with creating a certificate first.
Create Certificate
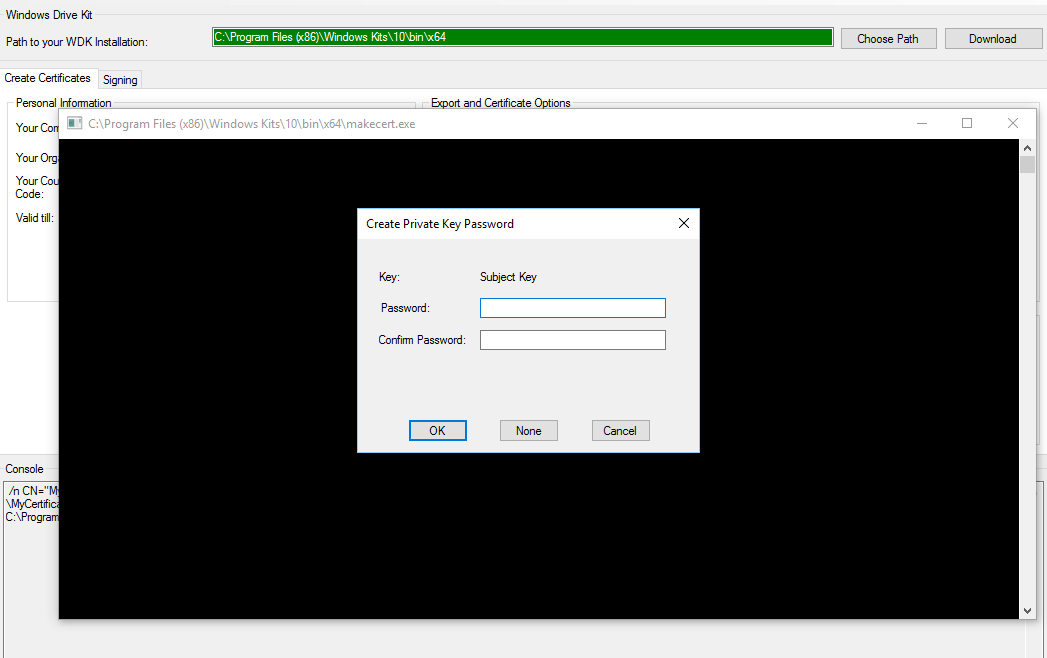
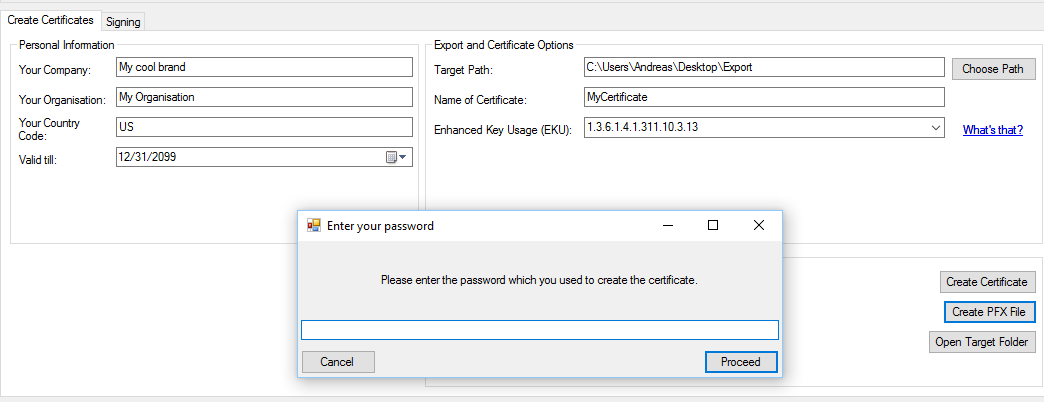
In order to generate your own certificate (.pvk and .cer files), you need to enter your details at the “Personal Information” panel. Moreover add the target path and some additional information at the “Export and Certificate Options” panel.

When you feel ready click the “Create Certificate” button at step “1) Create your certificates”. This will open a CMD window and prompt you to enter a password.
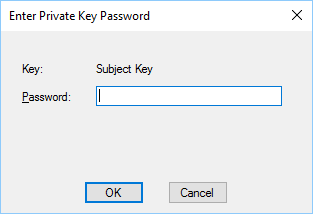
Second password prompt.
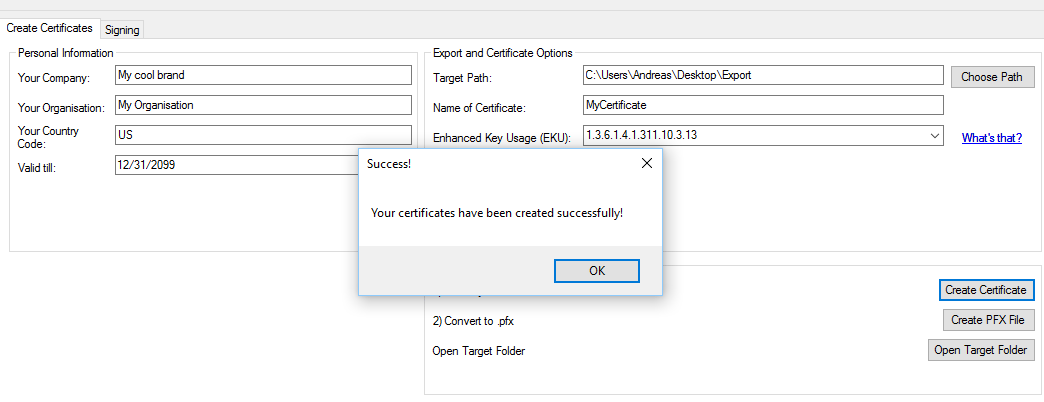
If all went well, you will get following message.
Convert to PFX
Now we need to merge our .pvk and .cer file to a .pfx file. To do this, click the “Create PFX File” button at step “2)”. The tool will open a file dialog. Select the .pvk and .cer files and enter the password (the one you set at the creation of the certificate).
You also will get a notification if all went well.

Now you can open the epxort folder, for instance by clicking the “Open Target Path” button. There you’ll find your fancy certificate.
Signing
This feature is implemented, yet hasn’t been tested.