Enroll to Apple Developers
In order to publish your game to iTunes you’ll need an apple developer account first. Please see below what’s needed.
What you need?
- At least one test device (an Iphone or an Ipad, best is to have both, a phone and a tablet)
- A Mac Computer
- XCode installed on a Mac Computer
- An active membership for iTunes Connect
Choose the membership
There are a few options available for the Apple Developer Membership. If you want to learn more, please see Apple’s Support page.
[creativ_button url=”https://developer.apple.com/support/membership/” icon=”book” label=”Apple Developer – Membership” colour=”blue” colour_custom=”” size=”medium” edge=”rounded” target=”_blank”]
Then choose your wished membership and enroll here.
[creativ_button url=”https://developer.apple.com/support/compare-memberships/” icon=”user” label=”Apple Developer – Enroll” colour=”blue” colour_custom=”” size=”medium” edge=”rounded” target=”_blank”]
Just scroll to the wished membership and click on “Learn about enrollment”. Once you have finished the enrollment and paied the fee, it may take 6-24h till your account goes live. You’ll be notifed by Apple then.
Generate your Certificates
Generally
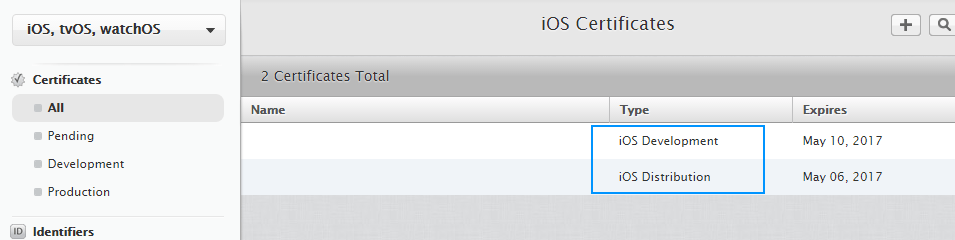
There are two types of certificates available, one for Produktion (uploading your game to the store) and one for Development (in order to test your game without the iTunes Store). In order to create and manage your certificates, please visit your Apple Developer Account by clicking the button below.
[creativ_button url=”https://developer.apple.com/account/” icon=”user” label=”Apple Developer” colour=”blue” colour_custom=”” size=”medium” edge=”rounded” target=”_blank”]
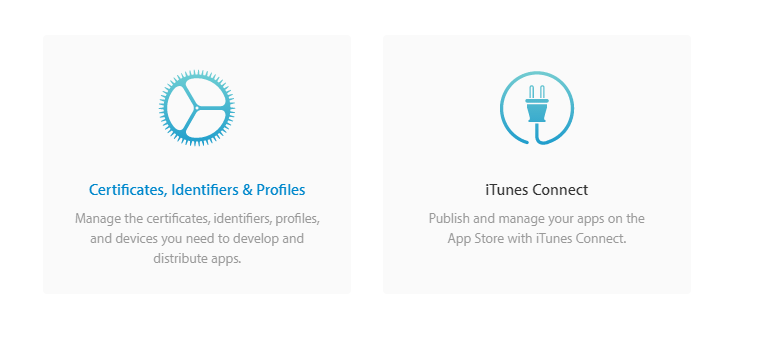
Then click on “Certificates, Identifiers & Profiles”
Create a new certificate
Befor you can start uploading your apps to the store, you going to need at least one certificate of each kind. The following guides will show you how to create them. But note, you must perform those steps on your mac computer!
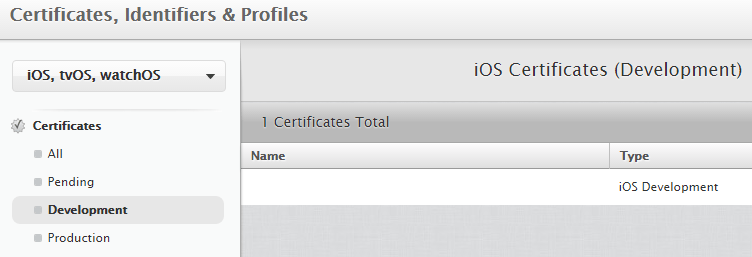
Development
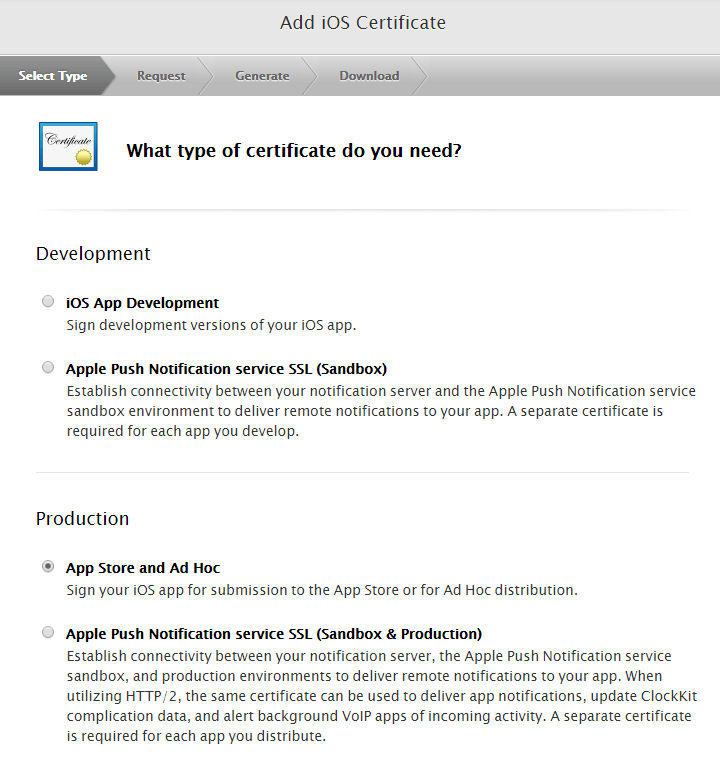
Select the “Development” tab in your certificate overview and click on the “+” symbol in order to add a new certificates.
Then select “iOS App Development” and click on continue.
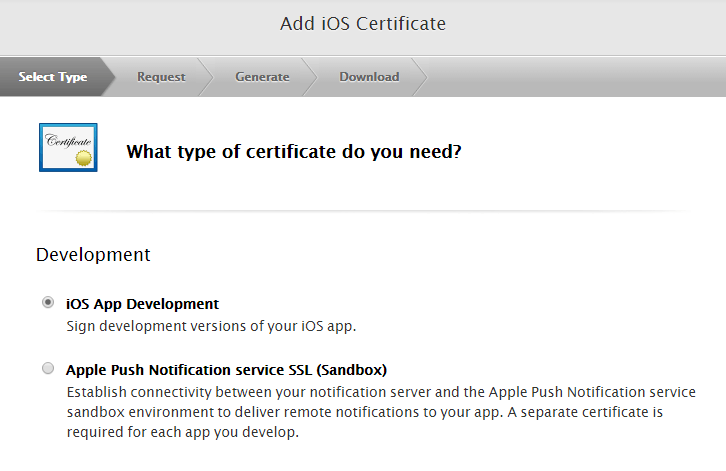
Then follow the instructions and create the “CSR” file.
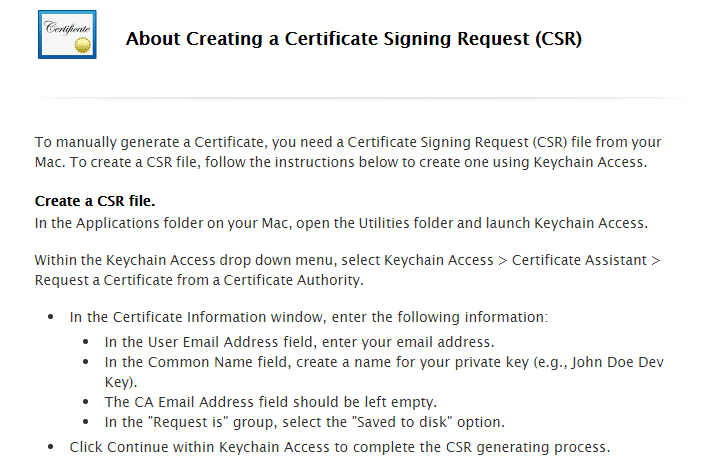
After you have created this file, upload it in the next step.

Then the platform will generate your certificate, which you can download afterwards.
Production
This basically works the same. The only diffrent is, that you have to select “App Store and Ad Hoc“.
Identifiers
Identefiers must be created for each app you want to upload to the store. Those identifieres will later connected to your app submission.
Create an Identifier
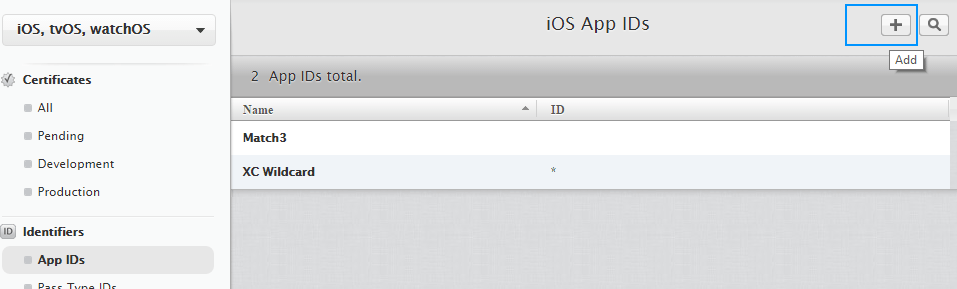
In order to create an identifier, select the “App ID” tab and click the “+” smybol.
App ID Description
This can be anything. It’s just needed to identify it later. I recommend you to use the app name. My next game is called “Triangle”, so I add this name.

App ID Prefix
This value will be generated automatically.
App ID Suffix
Choose here “Explicit APP ID” and enter your Bundle ID.
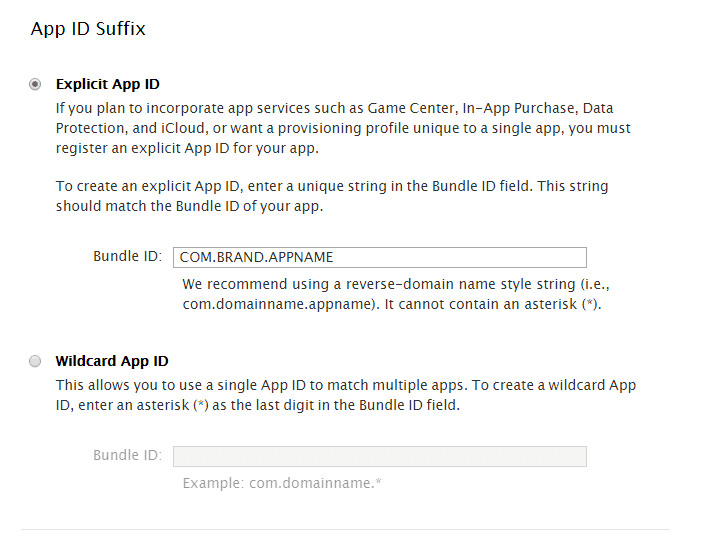
The set Bundle ID must match the one you used in your Cocoon.IO iOS settings!
App ID Services
Select the services you want to use with your app and click on Continue.
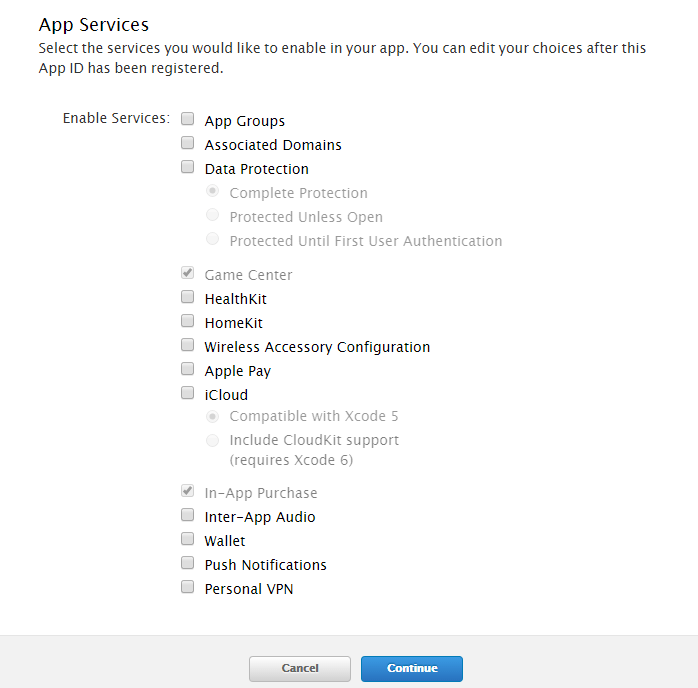
Then review your information and click on Register.
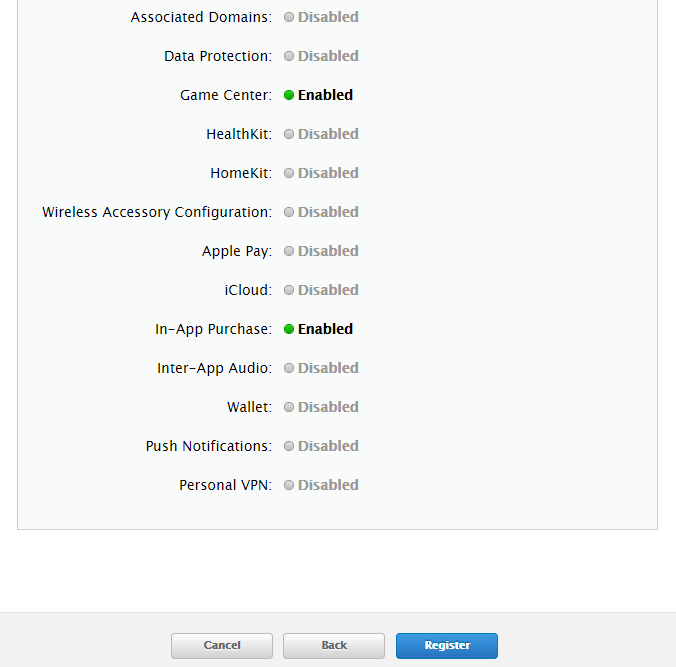
After that, your new identifier will be added to the list.
Your Devices
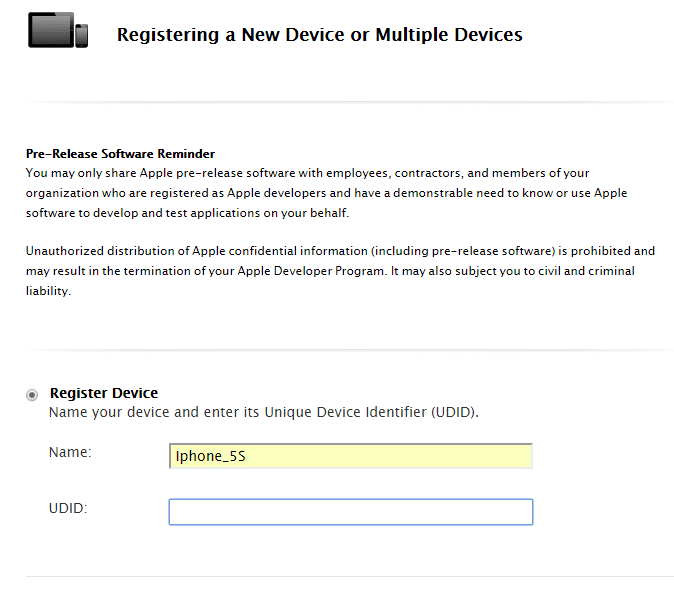
In this section you can register your Apple Devices as Test Devices. In order to do so, click the “+” symbol.
Add a new Device
Enter a name to identify your device later and the UDID of the device.
Find out your Device UDID
The UDID
In order to find out the UDID of your device, connect it to a computer running iTunes. Then click on the serial number till the UDID shows up.
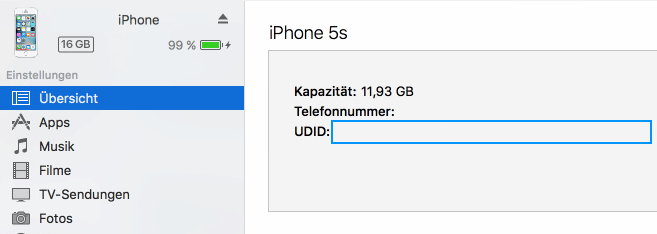
Copy this number and add it in the corresponding field and click on “Continue“.
Provisioning Profiles & p12
Provisioning Pfrofiles
General
Those profiles are needed to sign your application.
Add a Provisioning Profile
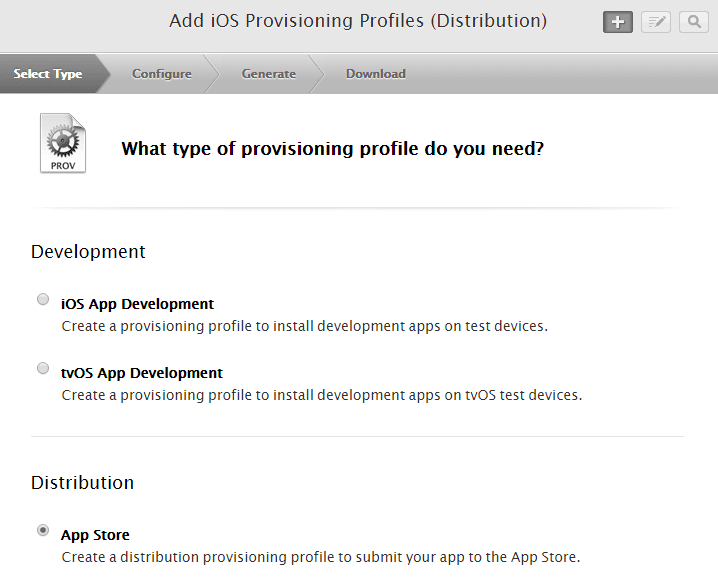
Development
Select the “Development” tab in your Provisioning Profiles overview and click on the “+” symbol in order to add a new Provisioning Profile.
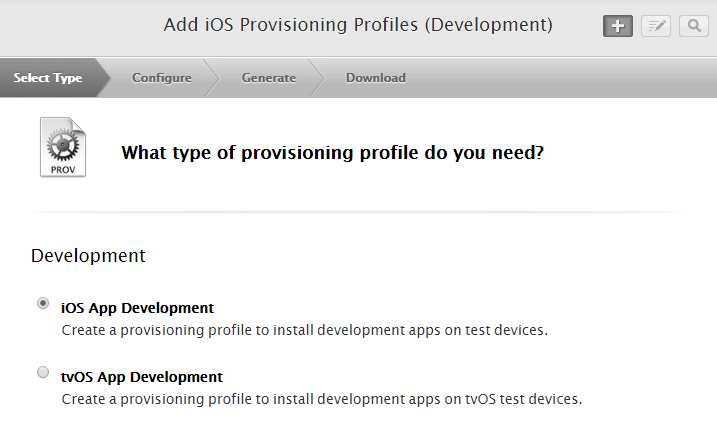
Then select “iOS App Development” and click on continue.

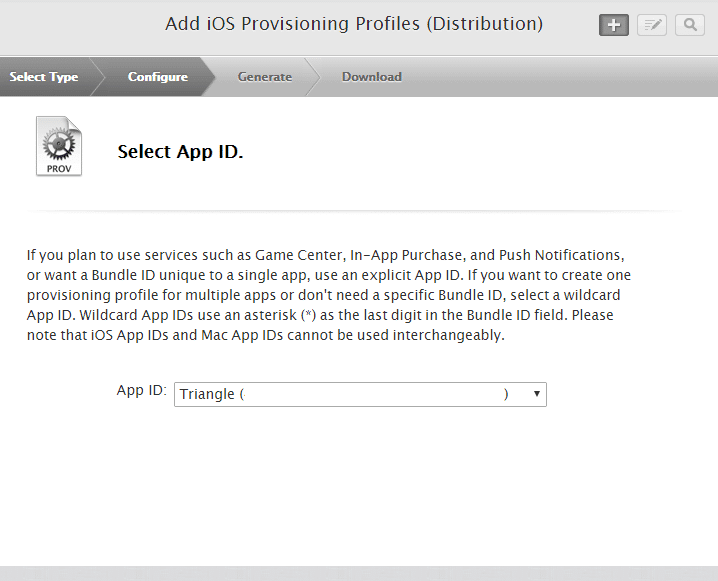
Then select your App ID and click on Continue.
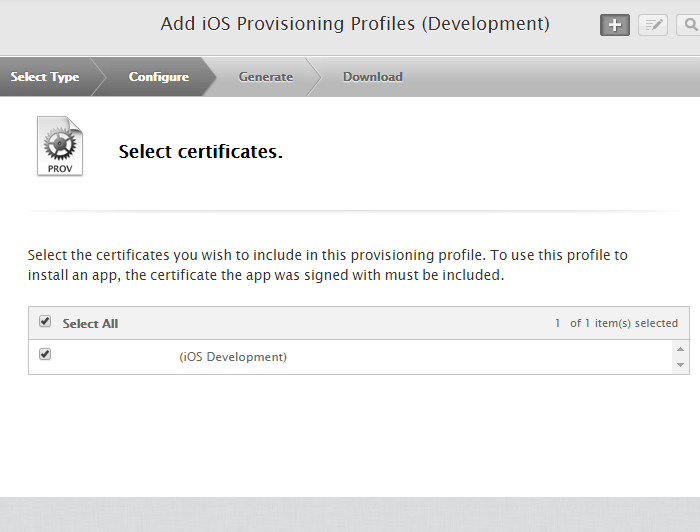
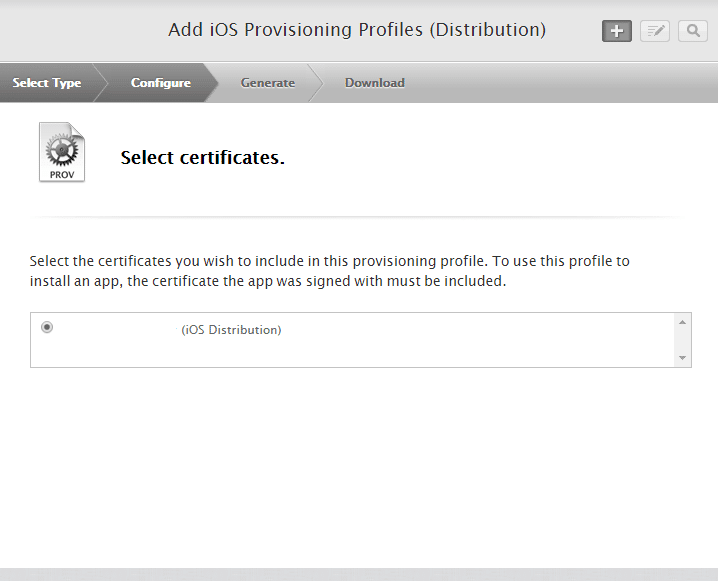
Then select your Development Certificate and click Continue.
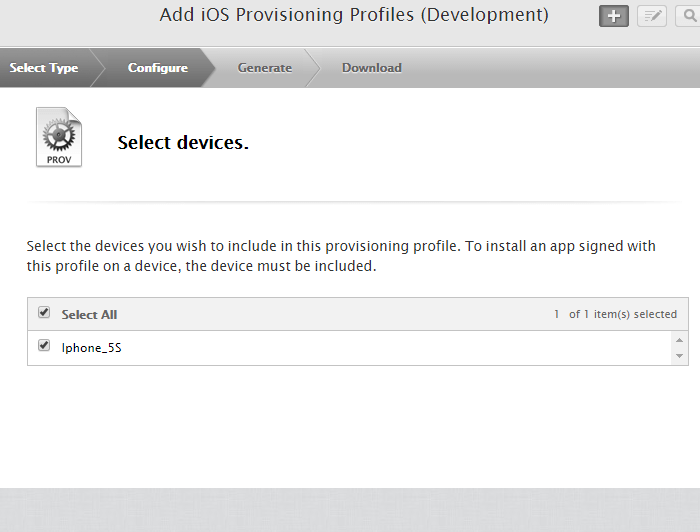
Then the device(s) you want to use for testing and click on Continue.
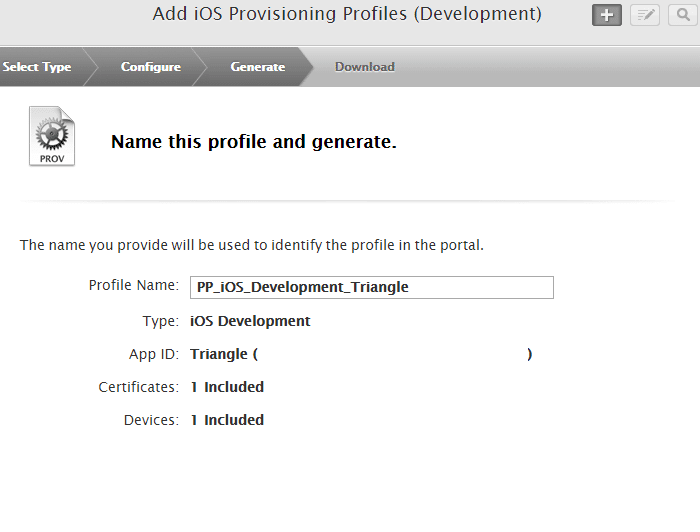
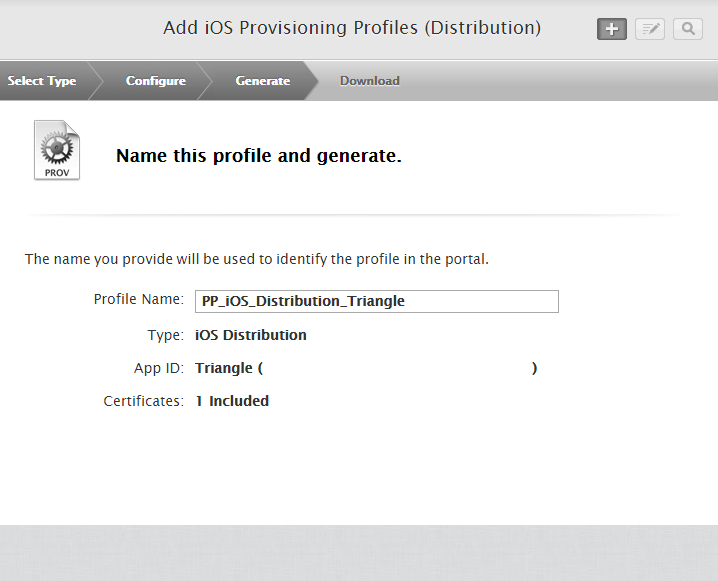
Give it a proper name in order to identify it later, then click Continue.
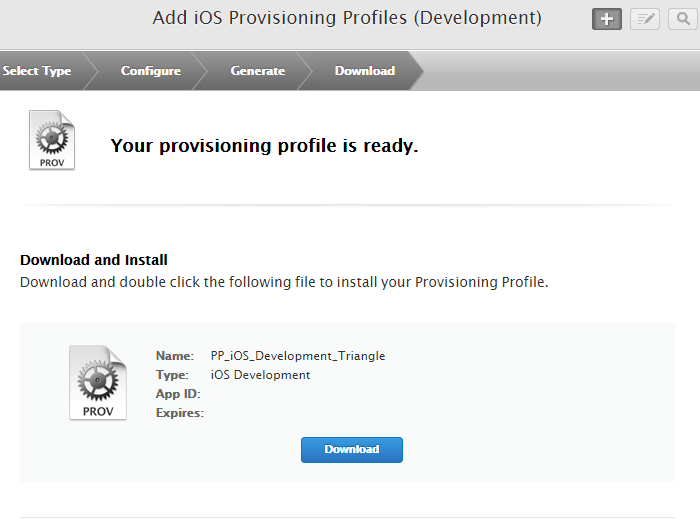
Now you can download it, save it and install it on your Mac or/and upload it to CocoonIO.
Production
This basically works the same. The only diffrent is, that you have to select “App Store” and “Ad Hoc” (yes, add two diffrent PP’s).
Then select your wished APP ID and click on Continue.
Select your Production Certificate and click on Continue.
Then give it a proper name and click on Continue in order to download your PP. Save it, install it and upload it to CocoonIO (if you want to).
p12
You’ll need a certificate for Production and for Development.
Just click on the corresponding tab (Development or Production) and follow the steps to create a certificate for it.
[creativ_alertbox icon=”info-sign” colour=”blue” custom_colour=””]It’s not necessary to add an iOS key to your CocoonIO Account. If you do not select any key, you’ll get a xcode archive file. Open this with XCode and you can export your Game for production / development as well. But if you do add a a key, you will directly get an .ipa file.[/creativ_alertbox]
Provisioning Profile
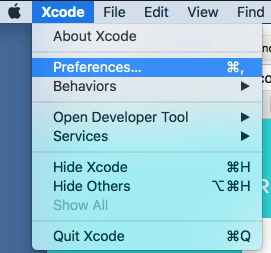
In order to get your Provisioning Profile open XCode on your Mac Computer and select Preferences.
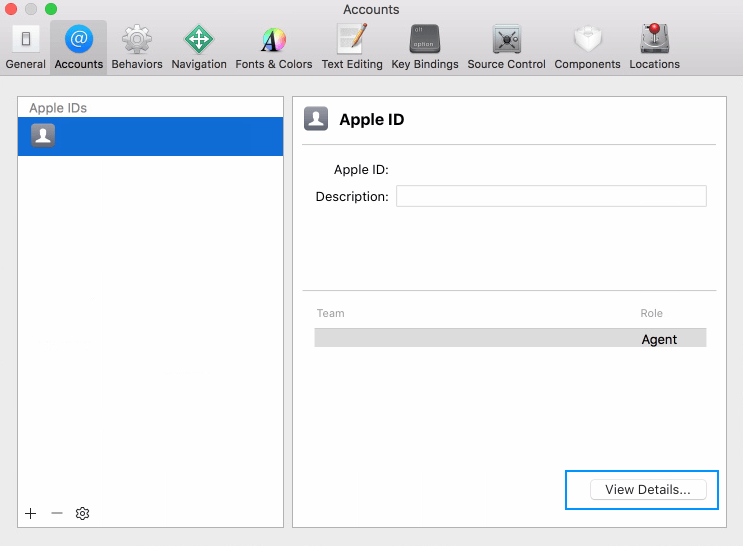
Then select your Developer Account and click on View Details.
Then perform a right-mouse click on your certificate and click on Show in Finder.
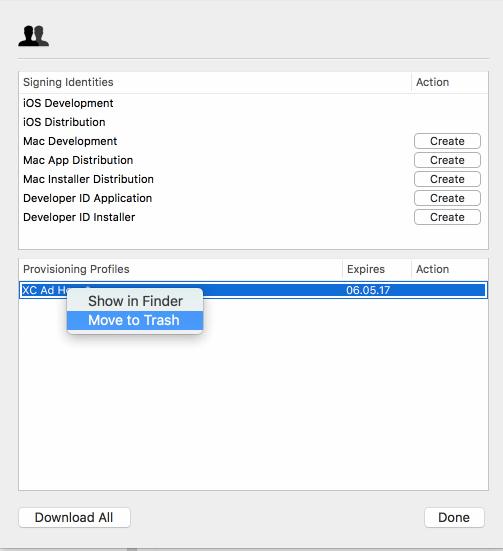
Hint: Rename it for better identification.
p12 Certificate
Open the Keychain Access application (in the Applications/Utilities folder) and select your certificate.

If the shown entries are missing, download your certificates from your Apple Developer Account first and then perform a double click on the corresponding certificate. This will add it to the Keychain Access App.
Perform a right mouse click on the corresponding certificate and choose “Export”.
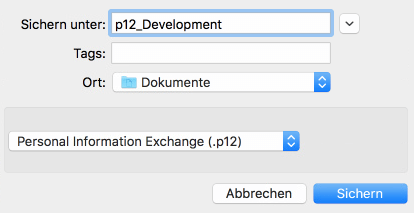
Give it a proper name, so it can be identified later.
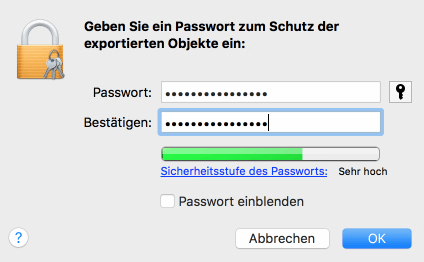
Then add a password. This password is the password you have to enter at CocoonIO or Intel XDK.
Congratulation!
So now you have added all you need in order to start uploading your first game to iTunes.
Itunes Connect
Dashboard
In order to upload and manage your games, please visit the Itunes Connect Dashboard and sign in with your Apple ID.
[creativ_button url=”https://itunesconnect.apple.com” icon=”user” label=”iTunes Connect – Dashboard” colour=”blue” colour_custom=”” size=”medium” edge=”rounded” target=”_blank”]
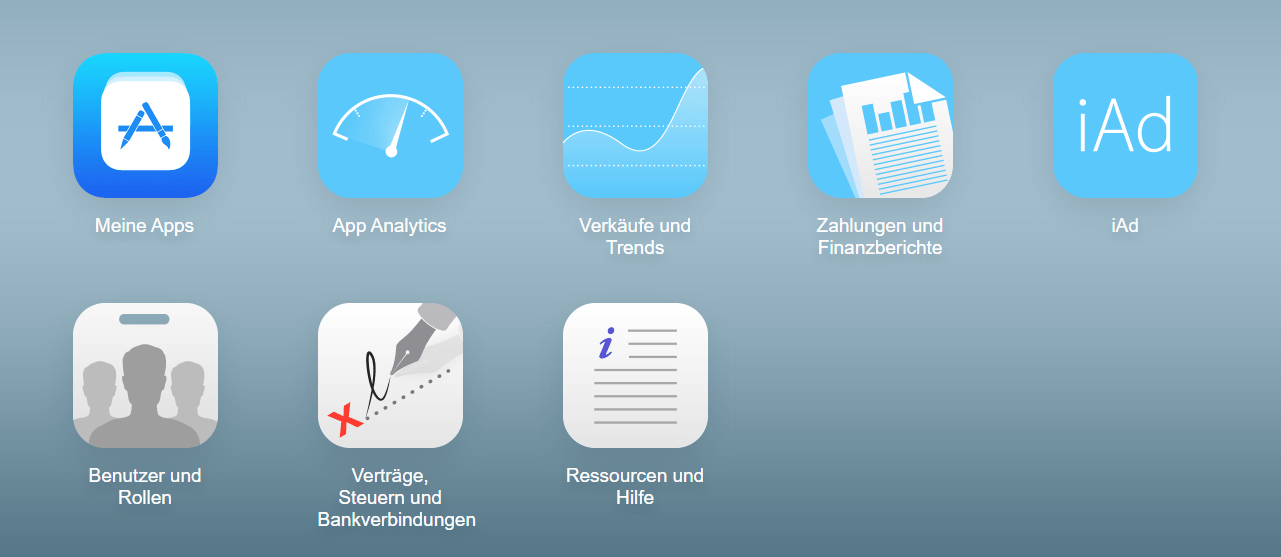
Once you have logged in, you’ll see following dashboard.
Learn more
Firstly I want to describe all the shown icons (and sections) above.
My Apps
Here you will find an overview of your apps. Moreover you can manage existing apps or upload new ones.
App Analytics
Should be self-explaining. Here you can have a sight into the analytic data of your apps, like downloads, active users and so on.
Sales and Trends
Data from your InApp or App sales.
Payments and sales Reports
Payments from your InApp or App sales.
iAd (deprecated)
It seems that iAd is not longer supported by Apple. Correct me if I’m wrong.
“iAd App Network will be Discontinued The iAd App Network will be discontinued as of June 30, 2016. Although we are no longer accepting new apps into the network, advertising campaigns may continue to run and you can still earn advertising revenue until June 30. If you’d like to continue promoting your apps through iAd until then, you can create a campaign using iAd Workbench. We will continue to keep you updated, but if you have any questions, contact us.” Notification by Apple
User and Roles
Here can you manage your users and their roles. Moreover you can setup and add Sandbox Test Accounts there, in order to test functions like InApp Purchases and so on.
Contracts, Taxes and Bank Transfer
This section is one of the most important one. Befor you start, fill out ALL needed information. Otherwise some features like InApp Purchase aren’t available. But more later.
Ressources and Help
Browse Apple’s Help page whenever you stuck on something.
Contracts
Before you can start uploading your game for the Apple iTunes Store, please complete all needed contracts.
[creativ_button url=”https://itunesconnect.apple.com/WebObjects/iTunesConnect.woa/da/jumpTo?page=contracts” icon=”pencil” label=”Contracts & Tax” colour=”theme” colour_custom=”” size=”medium” edge=”rounded” target=”_blank”]
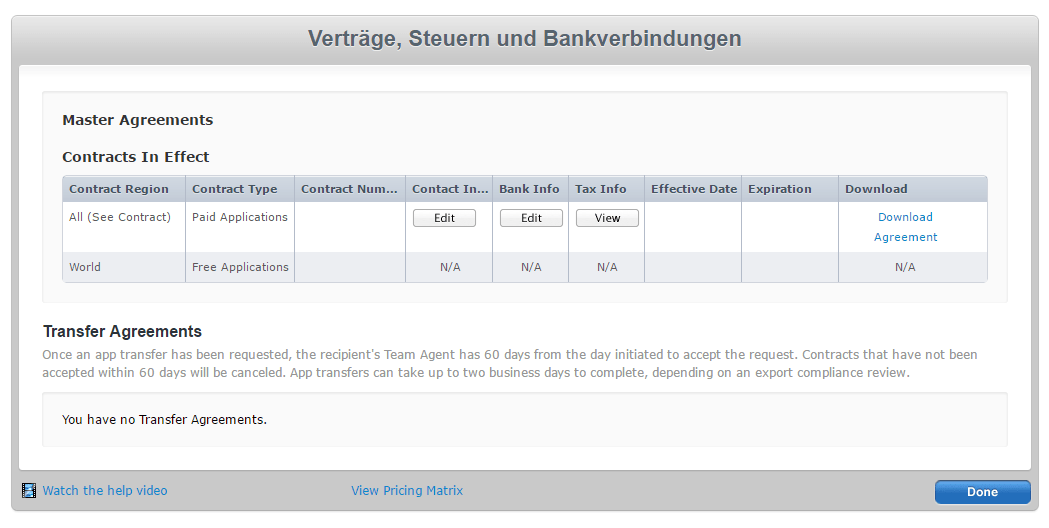
Note
You cannot add stuff like “InApp” Products without setting up the Tax Contract!
Build your Application
If you have setup your iTunes Account and if you have added all needed contracts, you can start build and upload your first App to the Apple iTunes Store
[creativ_button url=”https://cocoon.io/” icon=”heart” label=”Build with cocoon.io by Ludei” colour=”red” colour_custom=”” size=”medium” edge=”rounded” target=”_blank”]
We offer a guide showing you how to build your games using Construct 2 and Ludei’s CocoonIO. If you are new to that, please visit the guide and build your first application for Android and iOS!
[creativ_button url=”knowledgebase/cocoonio/” icon=”book” label=”Construct 2 – How to build with CocoonIO” colour=”blue” colour_custom=”” size=”medium” edge=”rounded” target=”_blank”]
Why build with CocoonIO?

CocoonIO is a services provided by Ludei offering following features:
- Has the best performance for mobile games build with Construct 2 (using Canvas+)
- Free Construct 2 Plugins for Ads, InApp, and Social Services like Facebook, Google Play Games and GameCenter
- A growing and helpful community
- An online documentation
- An easy to use platform
- Small application size
Up to now Ludei offers the best way to get your mobile games to Android and iOS. Moreover Ludei is working hard to improve their platform and their services! So give it a try and register a free account here.
[creativ_button url=”https://cocoon.io” icon=”heart” label=”CocoonIO” colour=”red” colour_custom=”” size=”medium” edge=”rounded” target=”_blank”]
Upload a Build
There are two ways to upload your binary to the iTunes Store. Choose the one you prefer the most.
Via XCode
Prepare
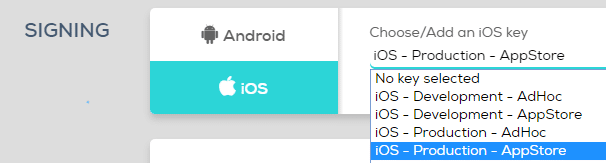
For this option, please deselect the iOS signning key in your CocoonIO Project.

Then “Compile” your game in CocoonIO.
XCode
When the compilation has finished, download the iOS build from CocoonIO and unzip it on your Mac Computer. You’ll get a “.xcarchive” file then.
[creativ_accordion][creativ_toggle accordion=”1″ icon=”book” heading=”Old” onload=”closed”]
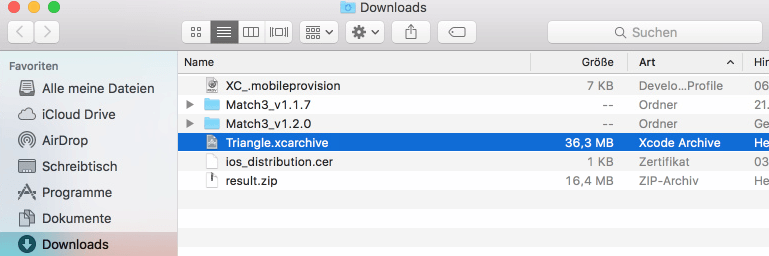
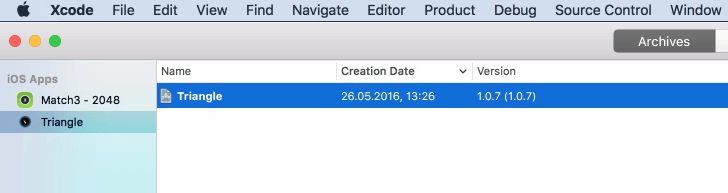
Double click the archive file in order to open it mit XCode.
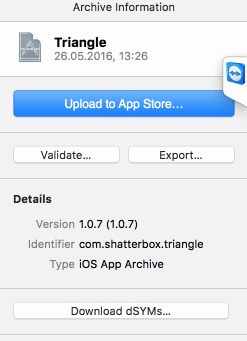
Click “Upload to App Store…” in order to upload this binary to your iTunes Connect Dashboard.
Select “Save for Ad Hoc Deploment” in order to install it via iTunes.
Then click on “Upload”.
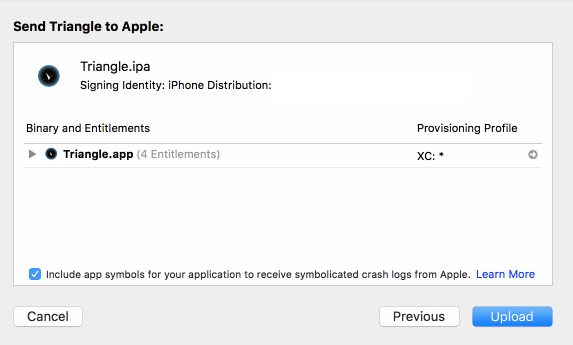
Then click on Upload in order to start the upload (this may take a while).
Note: The binary will be added automatically to the corresponding app (via the Bundle ID).
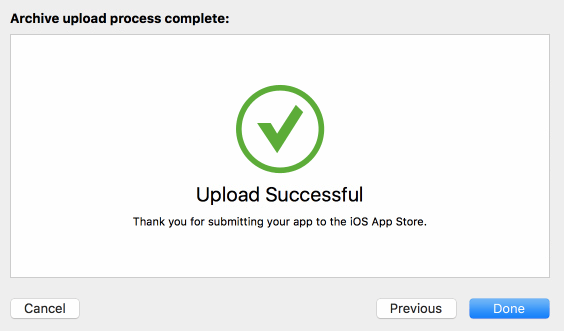
Once the upload has finished, it takes some time till Apple has processed the file. You’ll get notifed via mail then. Once you got the mail that your file has been processed, you can select it for the submission or for the TestFlight.
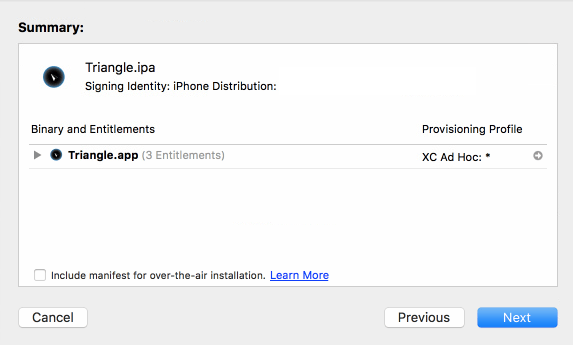
Test before Upload
If you want to test it first on your Apple device, just click “Export…” instead. This will generate an .ipa file which you can install on your registred Apple devices via iTunes.
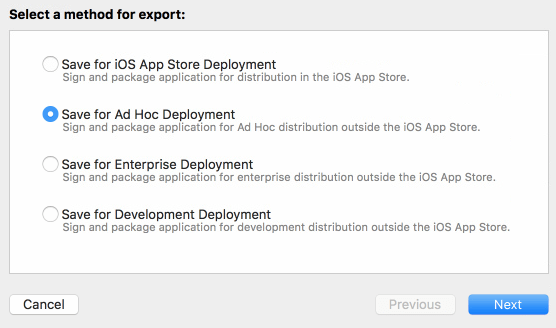
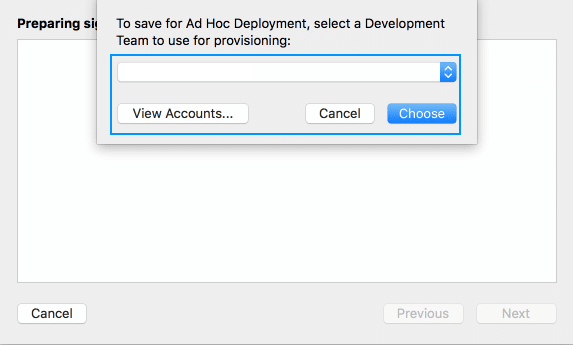
Select “Save for Ad Hoc Deploment” in order to install it via iTunes.
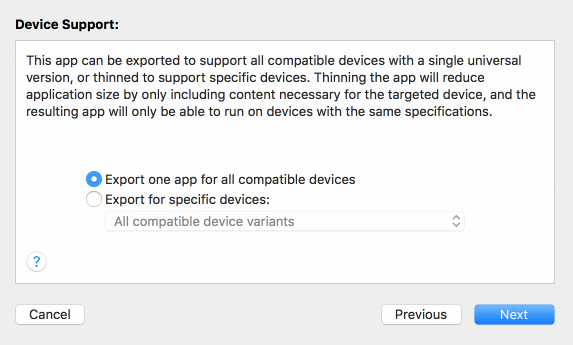
Then select your Developer Account and confirm it by clicking “Choose”.
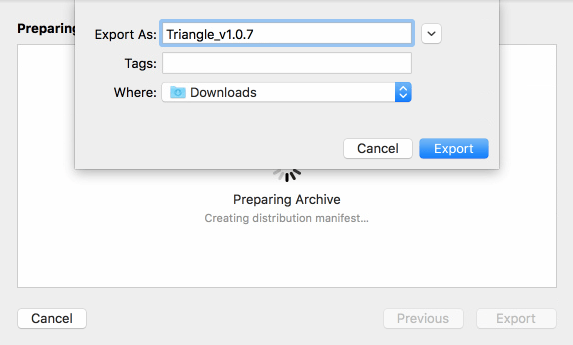
Then unzip the package and double-click the .ipa file. This will automatically open it with iTunes. Connect your test device and install it.
[/creativ_toggle][creativ_toggle accordion=”1″ icon=”book” heading=”New (since XCode update)” onload=”open”]
Please find the new guide for the latest XCode update here.
[/creativ_toggle][/creativ_accordion]
Via Application Loader
Prepare
For this option please select your “Production – AppStore” certificate.
You find a guide here.
[creativ_button url=”https://shatter-box.com/knowledgebase/cocoonio-how-to-build-a-game-using-construct-2/#document-8″ icon=”book” label=”Add Certificates to CocoonIO” colour=”blue” colour_custom=”” size=”medium” edge=”rounded” target=”_blank”]
Application Loader
Add your Application
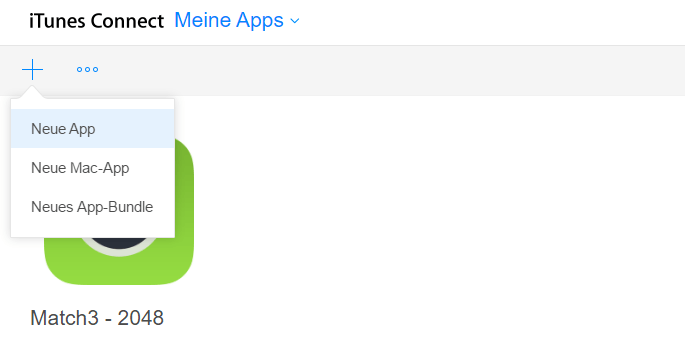
Finally we can start to add our application to the Apple iTunes Store. In order to do this, please click on the “My Apps” icon in your dashboard or click the link below.
[creativ_button url=”https://itunesconnect.apple.com/WebObjects/iTunesConnect.woa/ra/ng/app” icon=”cog” label=”iTunes – My Apps” colour=”blue” colour_custom=”” size=”medium” edge=”rounded” target=”_blank”]
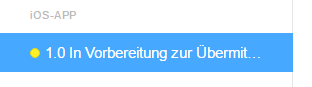
Then click on the small plus (+) icon in the header menu and select “New App” (“Neue App” in German).
Now fill out all needed information for your new app.
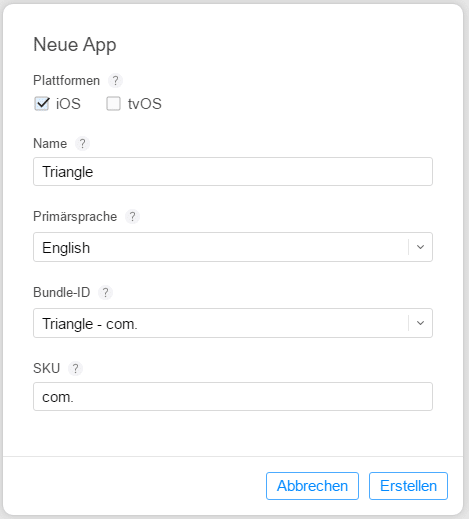
Then click on “Create” (“Erstellen” in German)
Prepare the Store Page
If the the app was added successfully you’ll be redirected to prepare the Store entry for your game. Most of the fields are already filled out. Just add the link the your Privacy Policy and select the categories for your app.
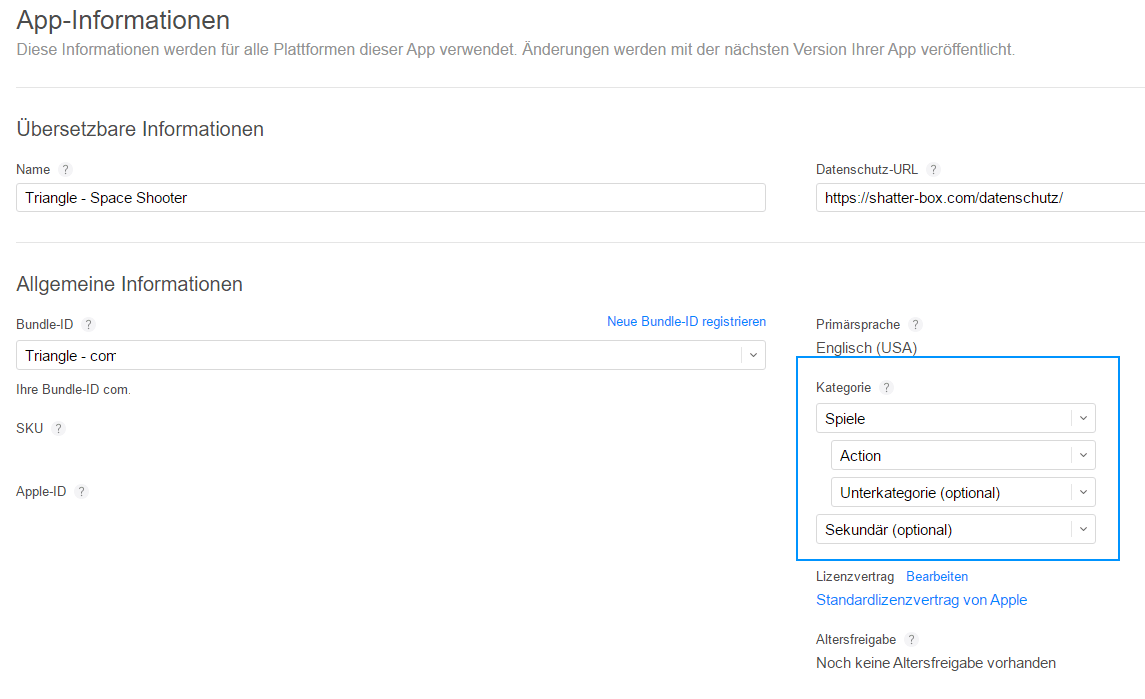
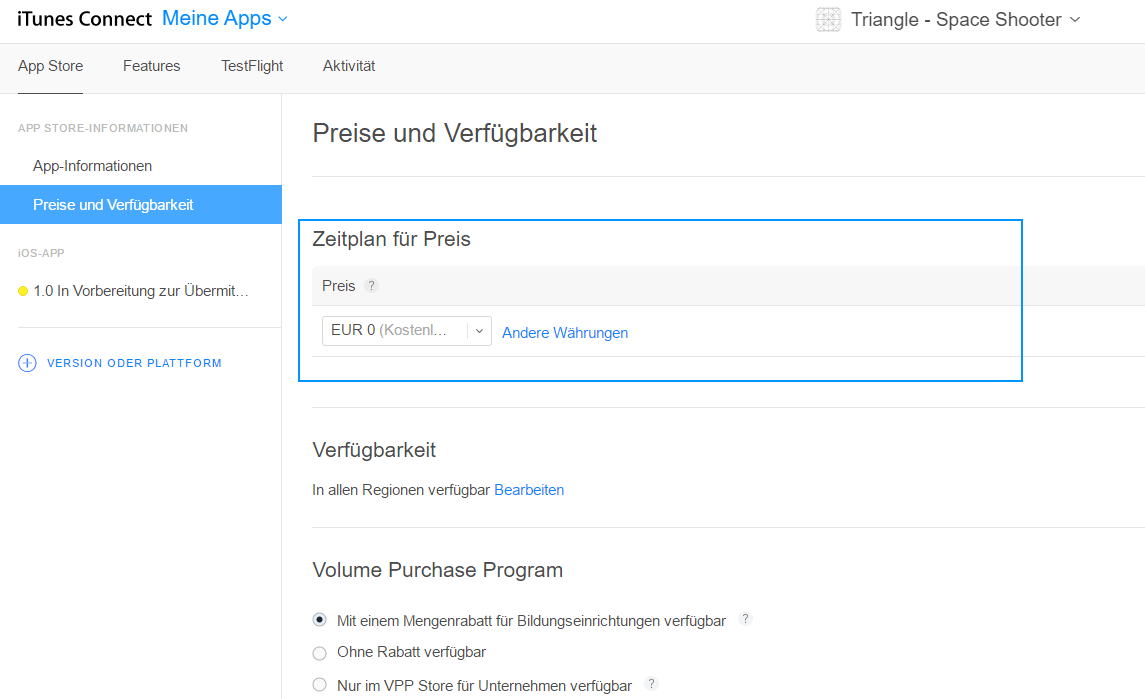
Then click on “Save” in the right upper corner of your screen. Then switch to “Price & Availability” and select the wished price for your app.
Add Features
In this section you can add features to your application.
InApp
Add InApp Products to your game.
[creativ_button url=”https://shatter-box.com/knowledgebase/ios-add-inapp-products/” icon=”book” label=”iTunes – How to add InApp Products” colour=”red” colour_custom=”” size=”medium” edge=”rounded” target=”_blank”]
GameCenter
Add a leaderboard and achievements to your game.
[creativ_button url=”https://shatter-box.com/knowledgebase/ios-create-a-gamecenter-leaderboard/” icon=”book” label=”iTunes – How to add GameCenter” colour=”red” colour_custom=”” size=”medium” edge=”rounded” target=”_blank”]
TestFlight
Before you submit your app you should have tested it well! Otherwise you will lose a lot of time while waiting for a review of your app which will be rejected then.
iOS App
First download the iOS TestFlight app on your test device(s) or any other Apple Device.
[appbox appstore 899247664]
iTunes Connect
Then select your app in the My Apps Dashboard and select the “TestFlight” tab in the header menu.
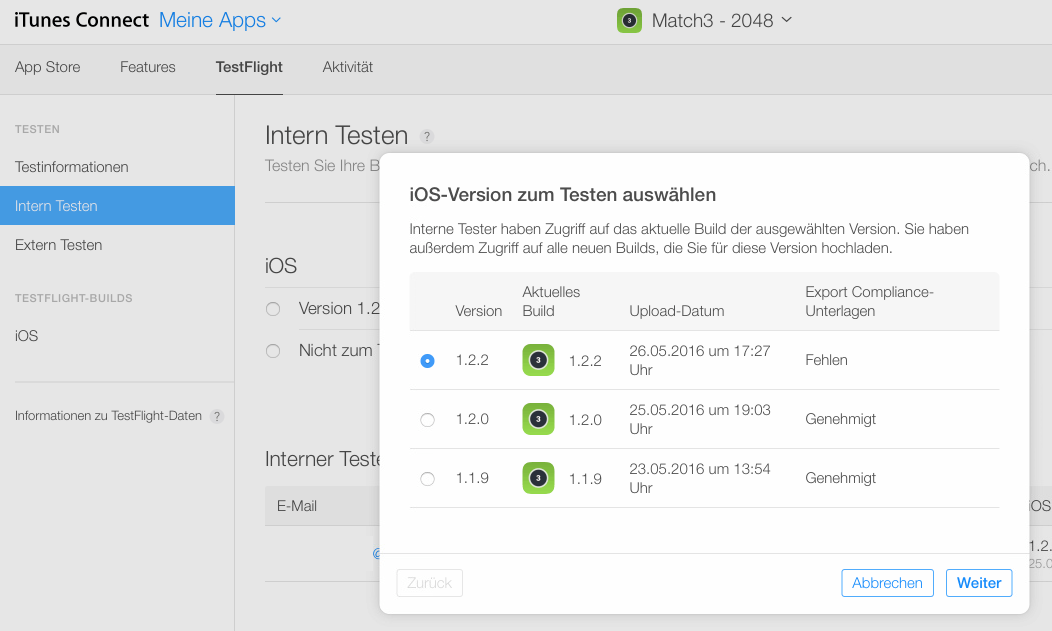
Select the build which you want to use for the TestFlight and then follow the assistance.
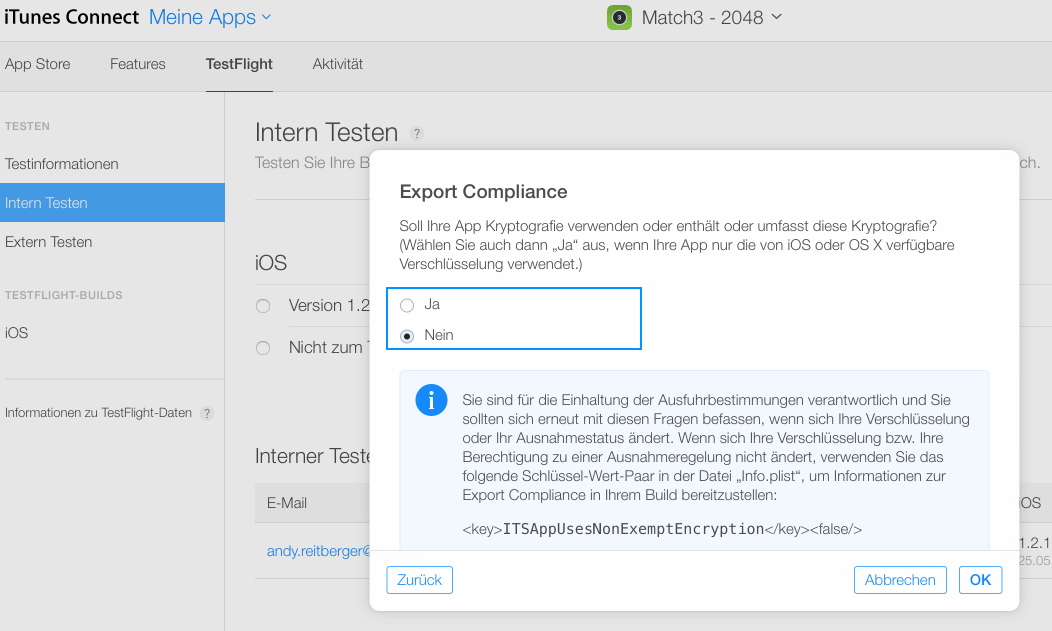
If you feel ready, save and publish the TestFligt for your app. Once you have done that, all listed testers will get an email with a redeem code. Use this code in the TestFlight application. Now you can test your game directly on your devices.

You will not be charged if you purchase an item from an app in Testflight!
Prepare your Submission
Now it’s time to prepare the first submission of your game. In order to do this, please click on the corresponding tab in the left-side menu.
The Screenshots
Upload here some screenshots of your game, but keep in mind that you have to upload screenshots for each display size!
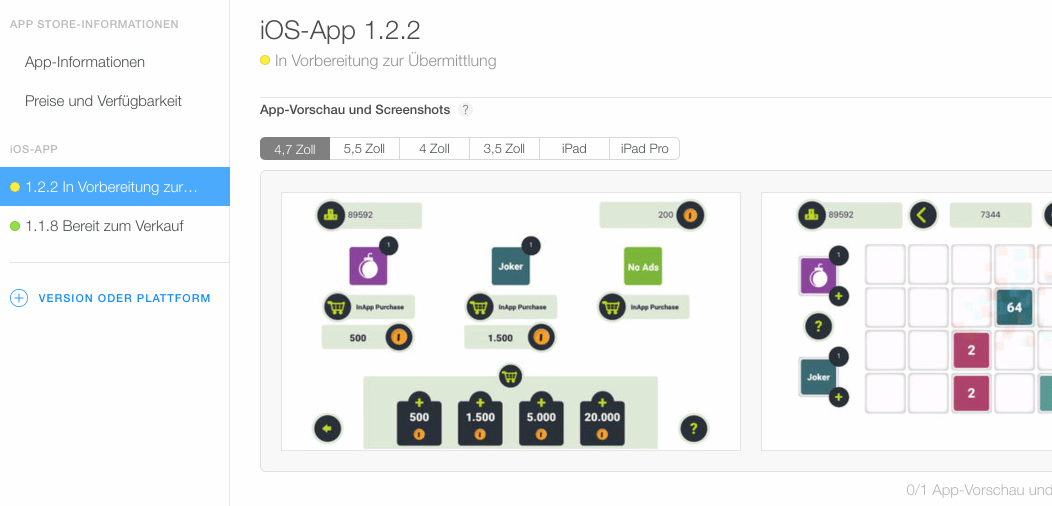
For more information about the screenshots, please visit the Apple Help Section
[creativ_button url=”https://developer.apple.com/library/ios/documentation/LanguagesUtilities/Conceptual/iTunesConnect_Guide/Appendices/Properties.html#//apple_ref/doc/uid/TP40011225-CH26-SW2″ icon=”book” label=”iTunes – Add Screenshots” colour=”blue” colour_custom=”” size=”medium” edge=”rounded” target=”_blank”]
The Description
In this section you can describe your game. Moreover use descriptive tags, so that people can find the game in the store easily.

Please note, no HTML-Tags are allowed in this section!
The Build
Here you can select an uploaded build for the submission. Just click the plus (+) icon and select the wished build.

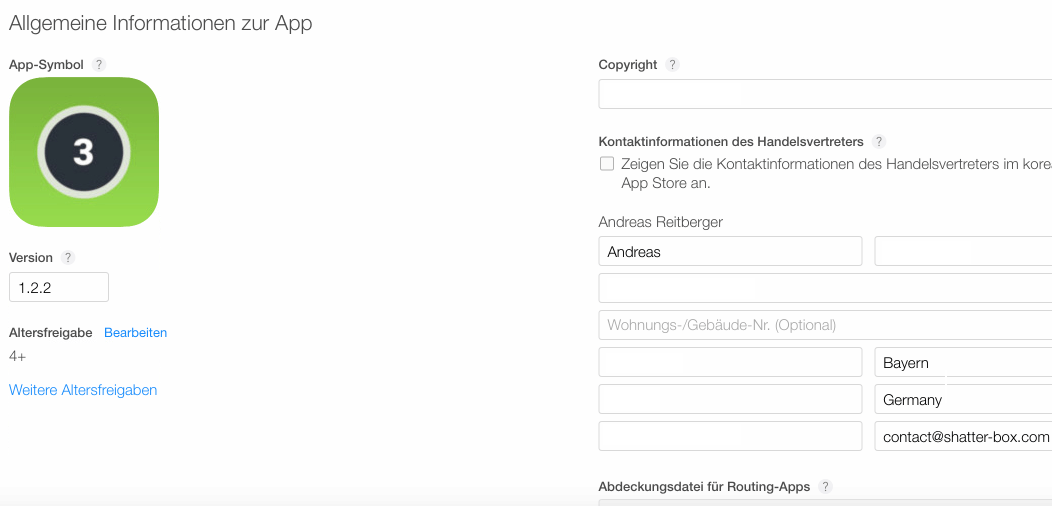
General Information
Here you need to add your personal information, like your address and so on. Moreover you have to upload the Store Icon here (note, this is not the Application Icon!)
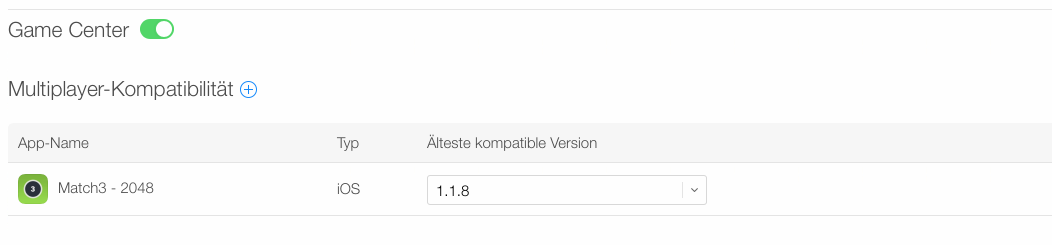
GameCenter
Activate the GameCenter for your application (if wished). But note, you need to create the GameCenter first at the Features tab.
InApps
InApp products don’t need to be added to the Submission. They are included automatically in the first submission.
App Review
Those information are for the app review team from Apple. So provide your name and contact data. Moreover you can add a description.
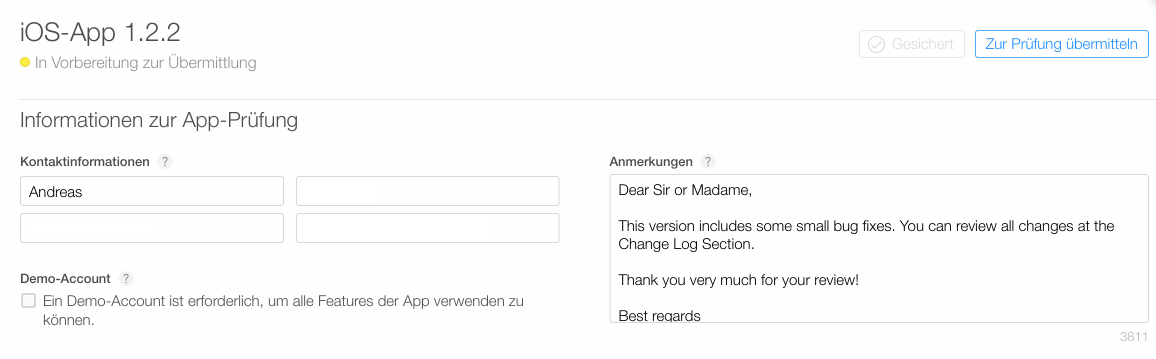
Once you feel ready click on “Submit to Review” and then your app will be reviewed by Apple. If you got lucky, your game will be available in a few days after submission. But the chances are high that your first submission will be rejected, so stay cool, fix the things which were the reason for the rejection and then submit a new binary.
My first game took three submissions till it finaly went live, so don’t be disappointed 🙂
Download
This guide was written for all newbies like me 😛 It took me very long till I knew how to publish my first application with Apple. So I decided to make this guide to help all others struggling the same then me.
If you want to show your support, please check and download my games. This helps me a lot
[creativ_button url=”https://goo.gl/CRp5ab” icon=”heart” label=”Google Play (Android)” colour=”green” colour_custom=”” size=”medium” edge=”rounded” target=”_blank”] and [creativ_button url=”https://goo.gl/A1210S” icon=”heart” label=”iTunes (iOS)” colour=”blue” colour_custom=”” size=”medium” edge=”rounded” target=”_blank”]
Or download them directly here.
[appbox googleplay com.matchtrhee.shatter]
[appbox appstore 1111204649]
Suggestions & Feedback
Every suggestion and feedback is appreciated! So don’t hesitate to get in touch with me. You can find me on
[creativ_button url=”https://www.scirra.com/users/andreasr” icon=”envelope” label=”Scirra (AndreasR)” colour=”green” colour_custom=”” size=”medium” edge=”rounded” target=”_blank”] [creativ_button url=”https://forums.cocoon.io/users/andy_reitberger” icon=”envelope” label=”CocoonIO” colour=”blue” colour_custom=”” size=”medium” edge=”rounded” target=”_blank”] [creativ_button url=”https://goo.gl/f2ynbq” icon=”twitter-sign” label=”Twitter” colour=”blue” colour_custom=”” size=”medium” edge=”rounded” target=”_blank”] [creativ_button url=”https://goo.gl/o2WaiH” icon=”facebook-sign” label=”Facebook” colour=”blue” colour_custom=”” size=”medium” edge=”rounded” target=”_blank”]
Disclaimer
The Apple logo, iPhone, iPod touch, iPad, iTunes Connect and iTunes are trademarks of Apple Inc., registered in the U.S. and other countries.
Note
This guide is not associated with Apple. I made this guide to help beginners to get started with developing for iOS. The content shown in the screenshots is property of Apple Inc.
If anyone feels offended by the content of this guide, don’t hesitate to contact me directly. I’ll give my very best to solve the issues then.
[creativ_button url=”/contact” icon=”envelope” label=”Mail us!” colour=”green” colour_custom=”” size=”medium” edge=”rounded” target=”_blank”]
Hey Andreas great tutorial do I have to create a new Certificate and provisional profile for every new App I create?
Thanks Jay
Hey Jay,
Thank you 🙂 there is no need to create one for each game, but you can handle it this way. You also can use the wildcard certificate for each game.
Regards Andy
Thank you very much for the continuing great standard of tutorials. I plan to use this one alongside the Construct 2 export to iOS. Is there any possibility you could make it in one tutorial for Construct 2 to Cocoon.io to Apple.
I have also seen many people on the Construct 2 website wanted a tutorial like this, so it would appeal to many I think
Thanks for the detailed tutorial but what the hell is wrong with these people? It takes half an hour at most to upload to Google Play and 2-3 hours to get a new app approved and published, maybe half an hour on updates. Also, getting your app to testers is about 10 times easier. I honestly don’t think I’ll have the patience to go through with this but I’ll have to give it a shot.
Please help me. I’m trying to compile in cocoon.io without having keys but this is returning a keychain error.
Email: pauloarturbl@gmail.com
“” “” “Have not had time …
Queued, will be added later … “” “”
When will be finished the tutorial. Thank you very much, I’m in great need of this.
I am returning KeyChain error in compiling IOS.
I found the solution.
If you want to know, contact me via email.
Email: pauloarturbl@gmail.com
Hi there Andreas!
first of all: what amazing job you did here, congrats for that men!
A little question
have you ever had this error with iOS phones when testing?
when I start the game the first thing that appears is a dialog with title of the game and the message
“Error fetching data.js” and a “Ok” button
the weird thing is that my compilation result was ok (no errors from cocoon.io, so I guess everything is fine)
and I’m not using IAP or weirds plugins, only the basics: browser, dict, arrays, etc…
the iPhone OS tested was with 11.x version, it could be an error from there?
Thanks in advance!
Hi there,
Thank you very much. I‘m glad that my guides are helpful for you.
About your issue. I never have had such an issue. Does this dialog come up in the Developer App or in a live built? I recently have built an ios project and it‘s working well on my iPhone running ios 11. If your error persist, you can open a topic in my support forum, and I‘ll check the capx for you.
Regards
Andy
Hi Andreas,
Firstly I really want to thank you for the detailed informations. It is very helpful for me.
Also I have a question about general App Store. Will my address that I entered in developer account be shown in App Store when I released my games? Or will only my name be shown? I declared my home address so I don’t want my address to be public.
Regards,
Mustafa
Hi Mustafa,
I’m glad that my guide was helpful for you 🙂
about your question, no. Your address isn’t visible in the app store.
At least I couldn’t see mine.
https://itunes.apple.com/us/app/fluffy-bounce-a-unicorn-tale/id1192987188?l=de&ls=1&mt=8
Let me know if you have any further questions in account of the iTunes App publishing.
Best
Andy
Your tutorial shows both a development and production certificate being created. Do I need to create both of them? What’s the difference between the two?
Hi Andy, thanks for your comment.
If you want to publish your game at Itunes you need the production cerrificate. If you want to just test the ipa files on your registered apple devices, you can use the development certificate.
Regards
Andy
hey, I’m new user ( CONSTRUCT3 ) when i publish to app loader it show this error (ERROR ITMS-90174: “Missing Provisioning Profile – Apps must contain a provisioning profile in a file named embedded.mobileprovision.”) how to resolve plz