What do I need?
In order to connect your Prusa i3 MK3 3D printer to Repetier Server Pro you need following components (soft- & hardware)
Mandatory
- Prusa i3 MK3s [Partnerlink] (or any other printer)
- Raspberry Pi 3 B+ [Amazon Partnerlink] (Version 2 might work as well)
- USB Power Supply [Amazon Partnerlink] (at least 2.5 A @ 5V)
- microSD card [Amazon Partnerlink] (recommended is at least 32 GB)
- Repetier Server Pro (30 days trial)
Otpional
- 7″ Raspberry Pi Touchscreen [Amazon Partnerlink] (official )
A touchscreen is not mandatory to run the Repetier Server Pro, however it allows you a better control directly at your printer.
Affilate
Looking for a good 3D printer or high quality filaments? Check out the brand new prusa store*!

Psst.. Have you seen the brand new Prusa XL already? Check it out here*.
*(affiliate / partner link, we get a commission for each purchase. Thank you for supporting us!)
Prepare your Raspberry Pi
First of all you need to download the disk image for the Raspberry Pi from the Repetier Server homepage. To do so, just follow the link below.
Download:
https://www.repetier-server.com/download-repetier-server/
Flash the image
There are several ways to do this, but the easiest might be to use the tool Etcher for this job. You can download it for free from this link.
Once downloaded, please run the application and select the previously downloaded disk image. There is no need to unzip it.
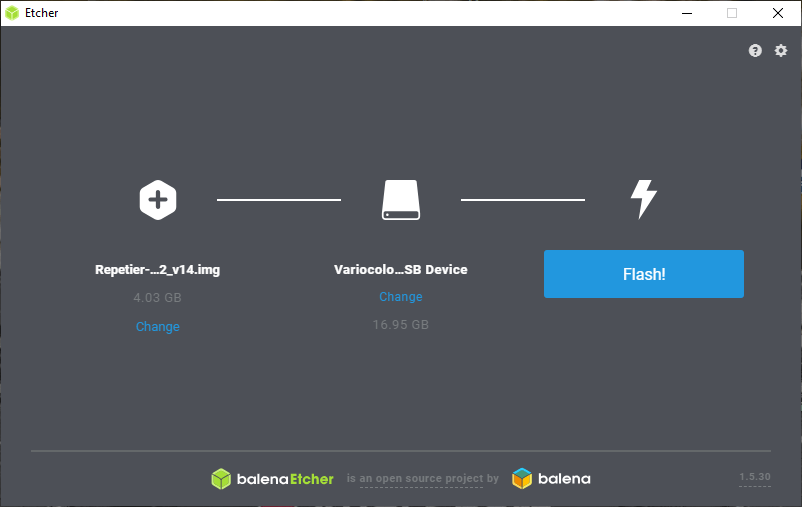
Select now your target sd card and start with the “Flash!” button. Make sure that you have nothing important stored on your sd card! The flash process will wipe out all data on your card!
Assemble your touch screen
If you’ve decided to purchase a touch screen, please follow the instructions of your touch screen and connect it to your Raspberry Pi.
Enclosure
If you are looking for an enclosure, you can download the printable files from thingiverse.
Repetier Server Pro
Configure your Prusa i3
When all preparation is done, connect your Prusa i3 [Partnerlink] printer to a free USB port on your Respberry Pi. During booting up, the printer might restart a few times. That’s quite normal, so don’t worry.
Depending on your network, please connect the Raspberry Pi either via wire or wifi. For setup, I recommend you to connect a cable.
When ready, go to your computer and visit Repetier Server Pro. You either can type in the name, or the IP address. If you do not know the IP address, use the name or check your router.
http://repetier-server.local/ or http://10.10.10.1 [this is just a symbolic address, please use your own IP here!]
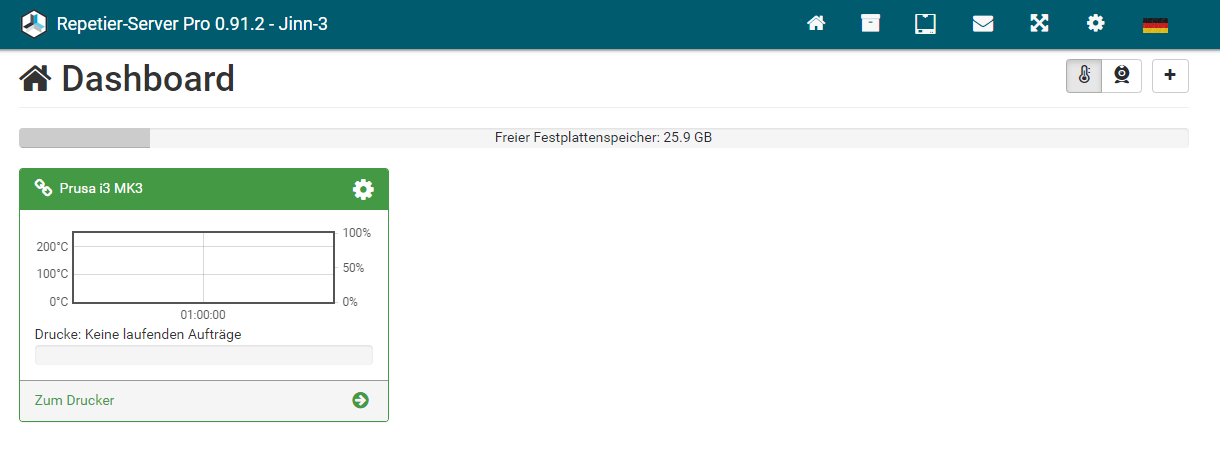
You should be able now to see the Repetier Server Dashboard.

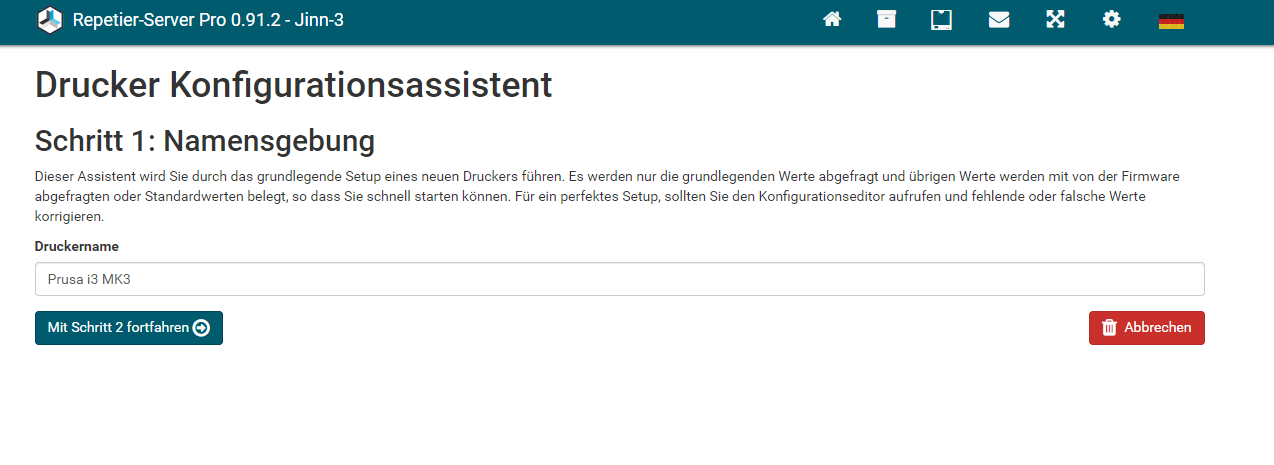
Make sure again that you’ve connected & powered up your printer at this step! If so, start the configuration wizzard by clicking the “Create new Printer” button.
First of all, give it a proper name. I did use “Prusa i3 MK3”.
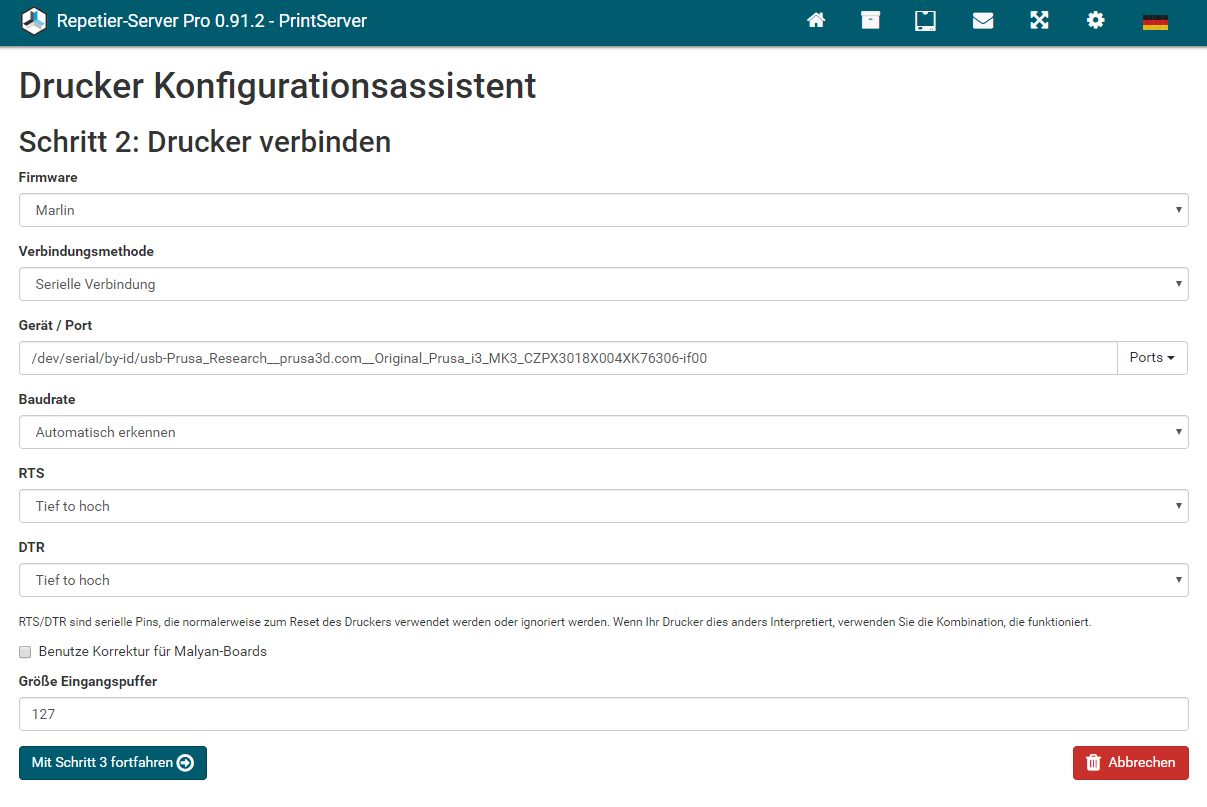
Now select “Marlin” as firmware. The config wizzard should now be able to load all parameters of your printer from its firmware. If not, please see the screenshot below as reference.
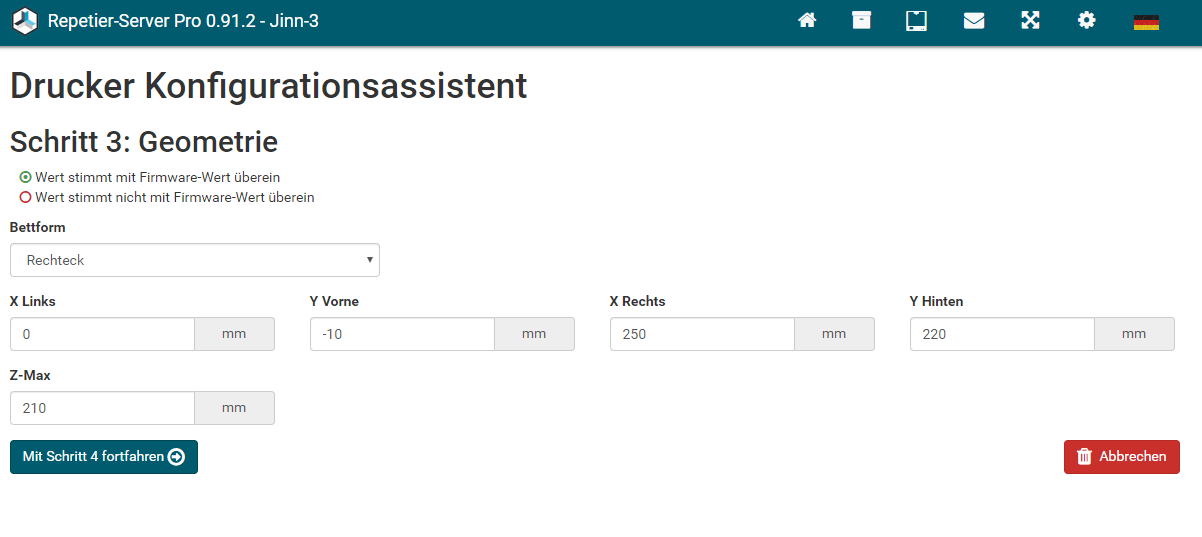
In the next step we add the size of the printer. As reference, use the screenshot below.
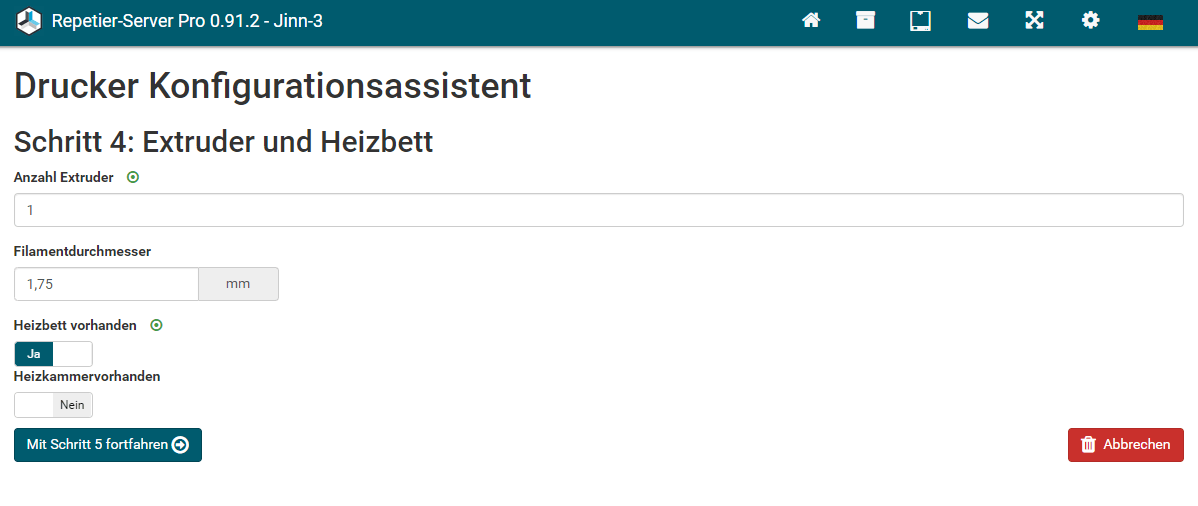
The extruder and heatbed settings should be correct, so no need to update this section. For double check, use the screenshot below.
For the last step, please set “Fan” to 1. This is the fan cooling the filament, not the one cooling the hotend!
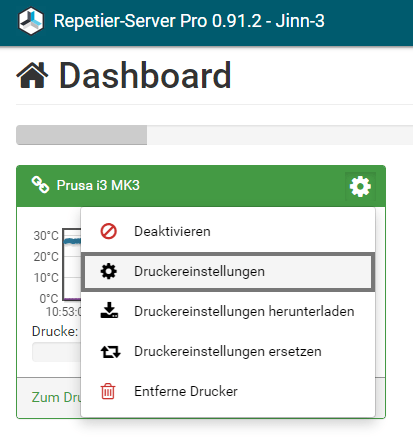
That’s it. Your printer is now configured in your Repetier Server Pro print server. However we need to do some adjustments in the configuration. In order to do this, please click on the small gear next the the printer name and select “Printer settings”.
Now we need to adjust following parameters.
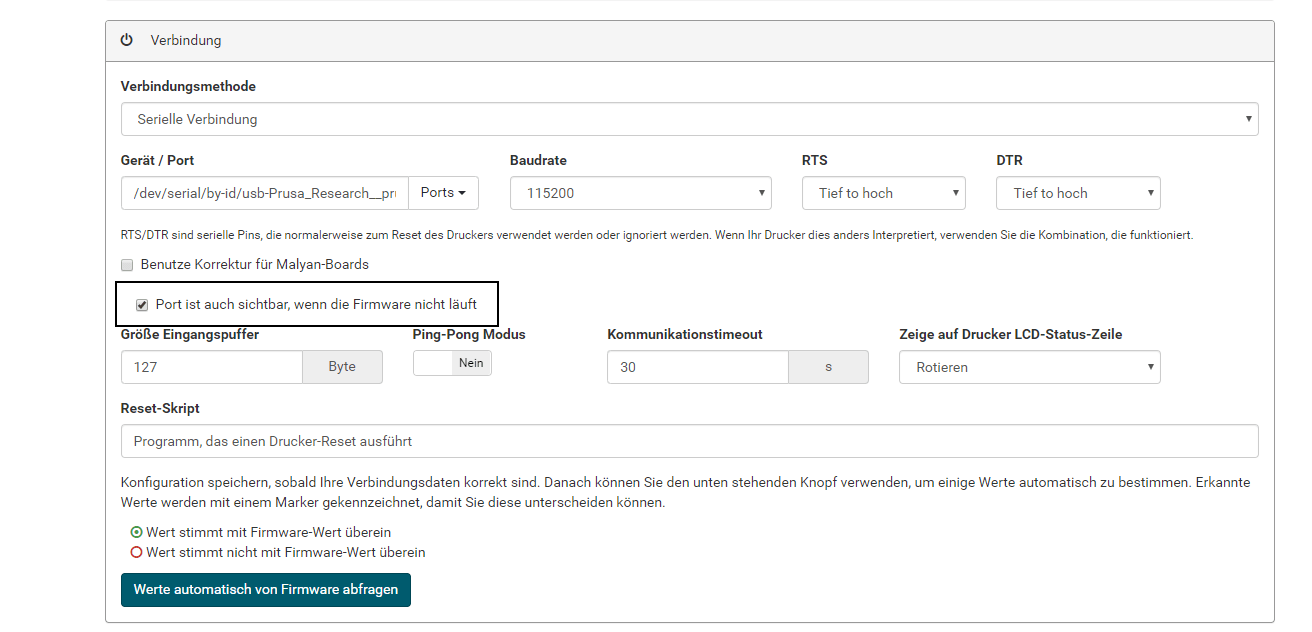
Connection
Tick the checkbox saying “Port is visible, even if firmware is not running”. See the screenshot for reference.
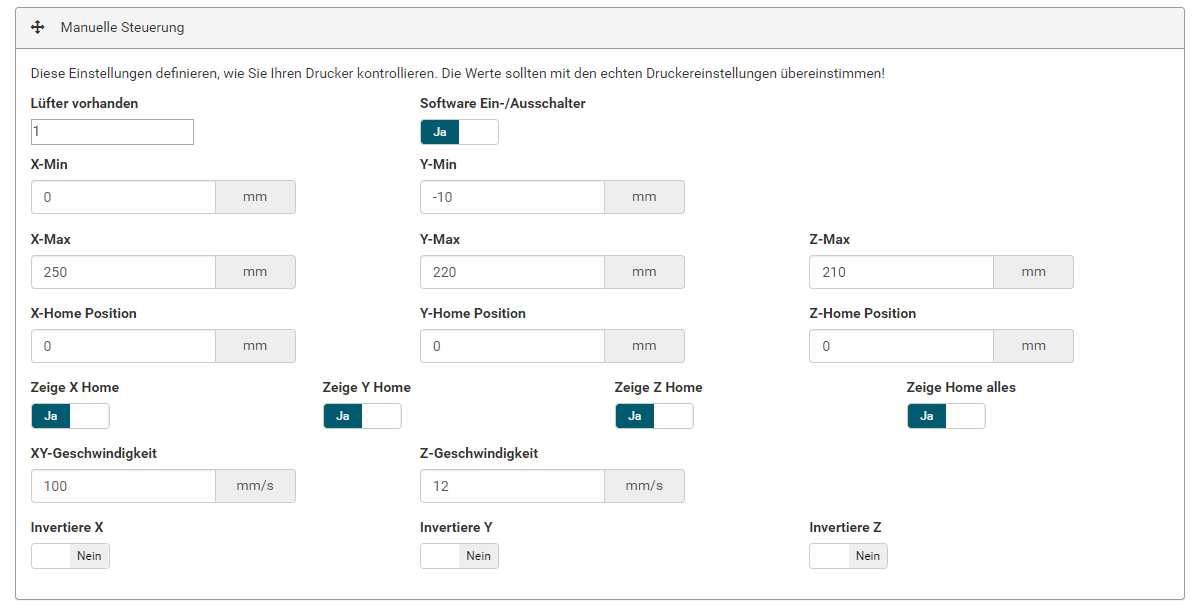
Manual control
Here set the same values for the geometry as you did in the config wizzard. If you do not set those values, you will get message that your print do not fit on the printer. Screenshot for reference.
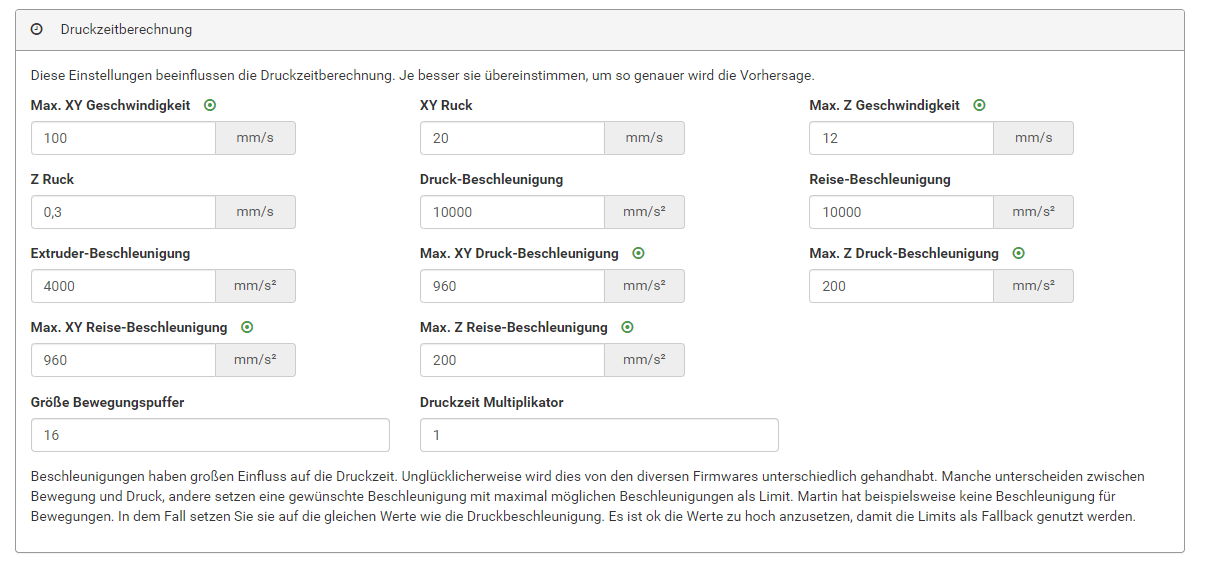
Print time calculation
Those values are mostly accurate. No need to adjust them. However if you feel your print time calculated from the slicer and the printer do not match, you can adjust it by altering the “print time multiplicator”.
Event based GCODE’s
GCODE’s are commands used to control the printer. This can be commands to move in X,Y or Z, to enable or disable the stepper motors and so on. You find an overview of all commands at the link below.
https://github.com/prusa3d/Prusa-Firmware/wiki/Supported-G-codes
On print cancelled
Add following GCODE to “Send, when print job is cancelled”.
G91 ; set to Relative position
G1 E-1 F300 ; retract filament a bit before lifting nozzle
G0 Z15 ; move z axis up 15mm
G90 ; set to Absolute position
G1 Y190 F5000 ; move part out for inspection
G1 X190 F5000 ; move nozzle out of the way

M84 ; disable motors

;disable all heaters
M104 S0 ; turn off extruder heat
M140 S0 ; turn off heated bed
M106 S0 ; Turn off fan
Source: prusa Forum
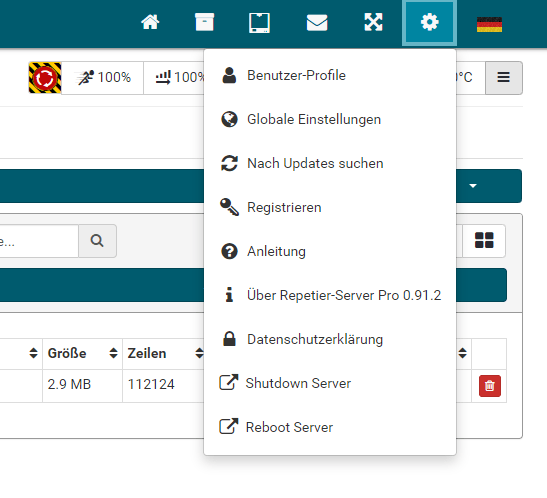
User management
It’s recommended to enable user managament! Otherwise any user in your network has access to your print server. To enable the user management, just click the small gear next to your language flag and select “User Profiles”.
Now create your first account.

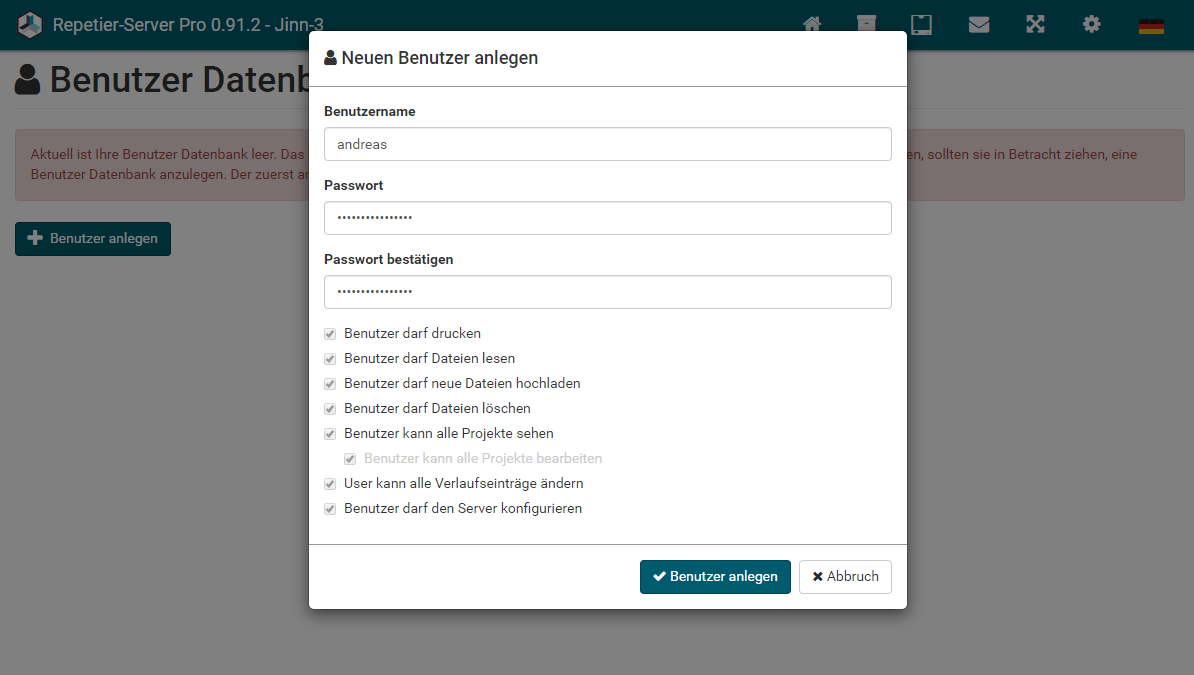
Now, whenever you visit your print server, you will be asked to enter your credentials first in order to get access to your printer(s).
Fast & Dirty
If you like it fast, you just can download our ready-to-use config file for the Prusa i3 MK3 [Partnerlink] printer below.